Nomad UI
The Nomad UI offers an easy to use web experience for inspecting a Nomad cluster. Jobs, Deployments, Task Groups, Allocations, Clients, and Servers can all be monitored from the Nomad UI. The UI also supports the use of ACL tokens for clusters that are using the Nomad Access Control List system.
~> **Beta Feature!** This page covers the Nomad UI, a feature of v0.7 which is still in beta.
Accessing the UI
First, let’s start nomad so it listens on all interfaces. You can run the following command for that:
nomad agent -dev -bind 0.0.0.0 &> nomad.log &
The Nomad UI is served on the same address and port as the HTTP API. It is namespaced
under /ui, but visiting the root of the Nomad server in your browser will redirect you
to the UI. If you are unsure what port the Nomad HTTP API is running under, try the default
port, 4646.h
You can access the Nomad UI by clicking here
Reviewing Jobs
The home page of the UI is the jobs list view. This page has a searchable, sortable, paginated table of all jobs in the cluster, regardless of job status.
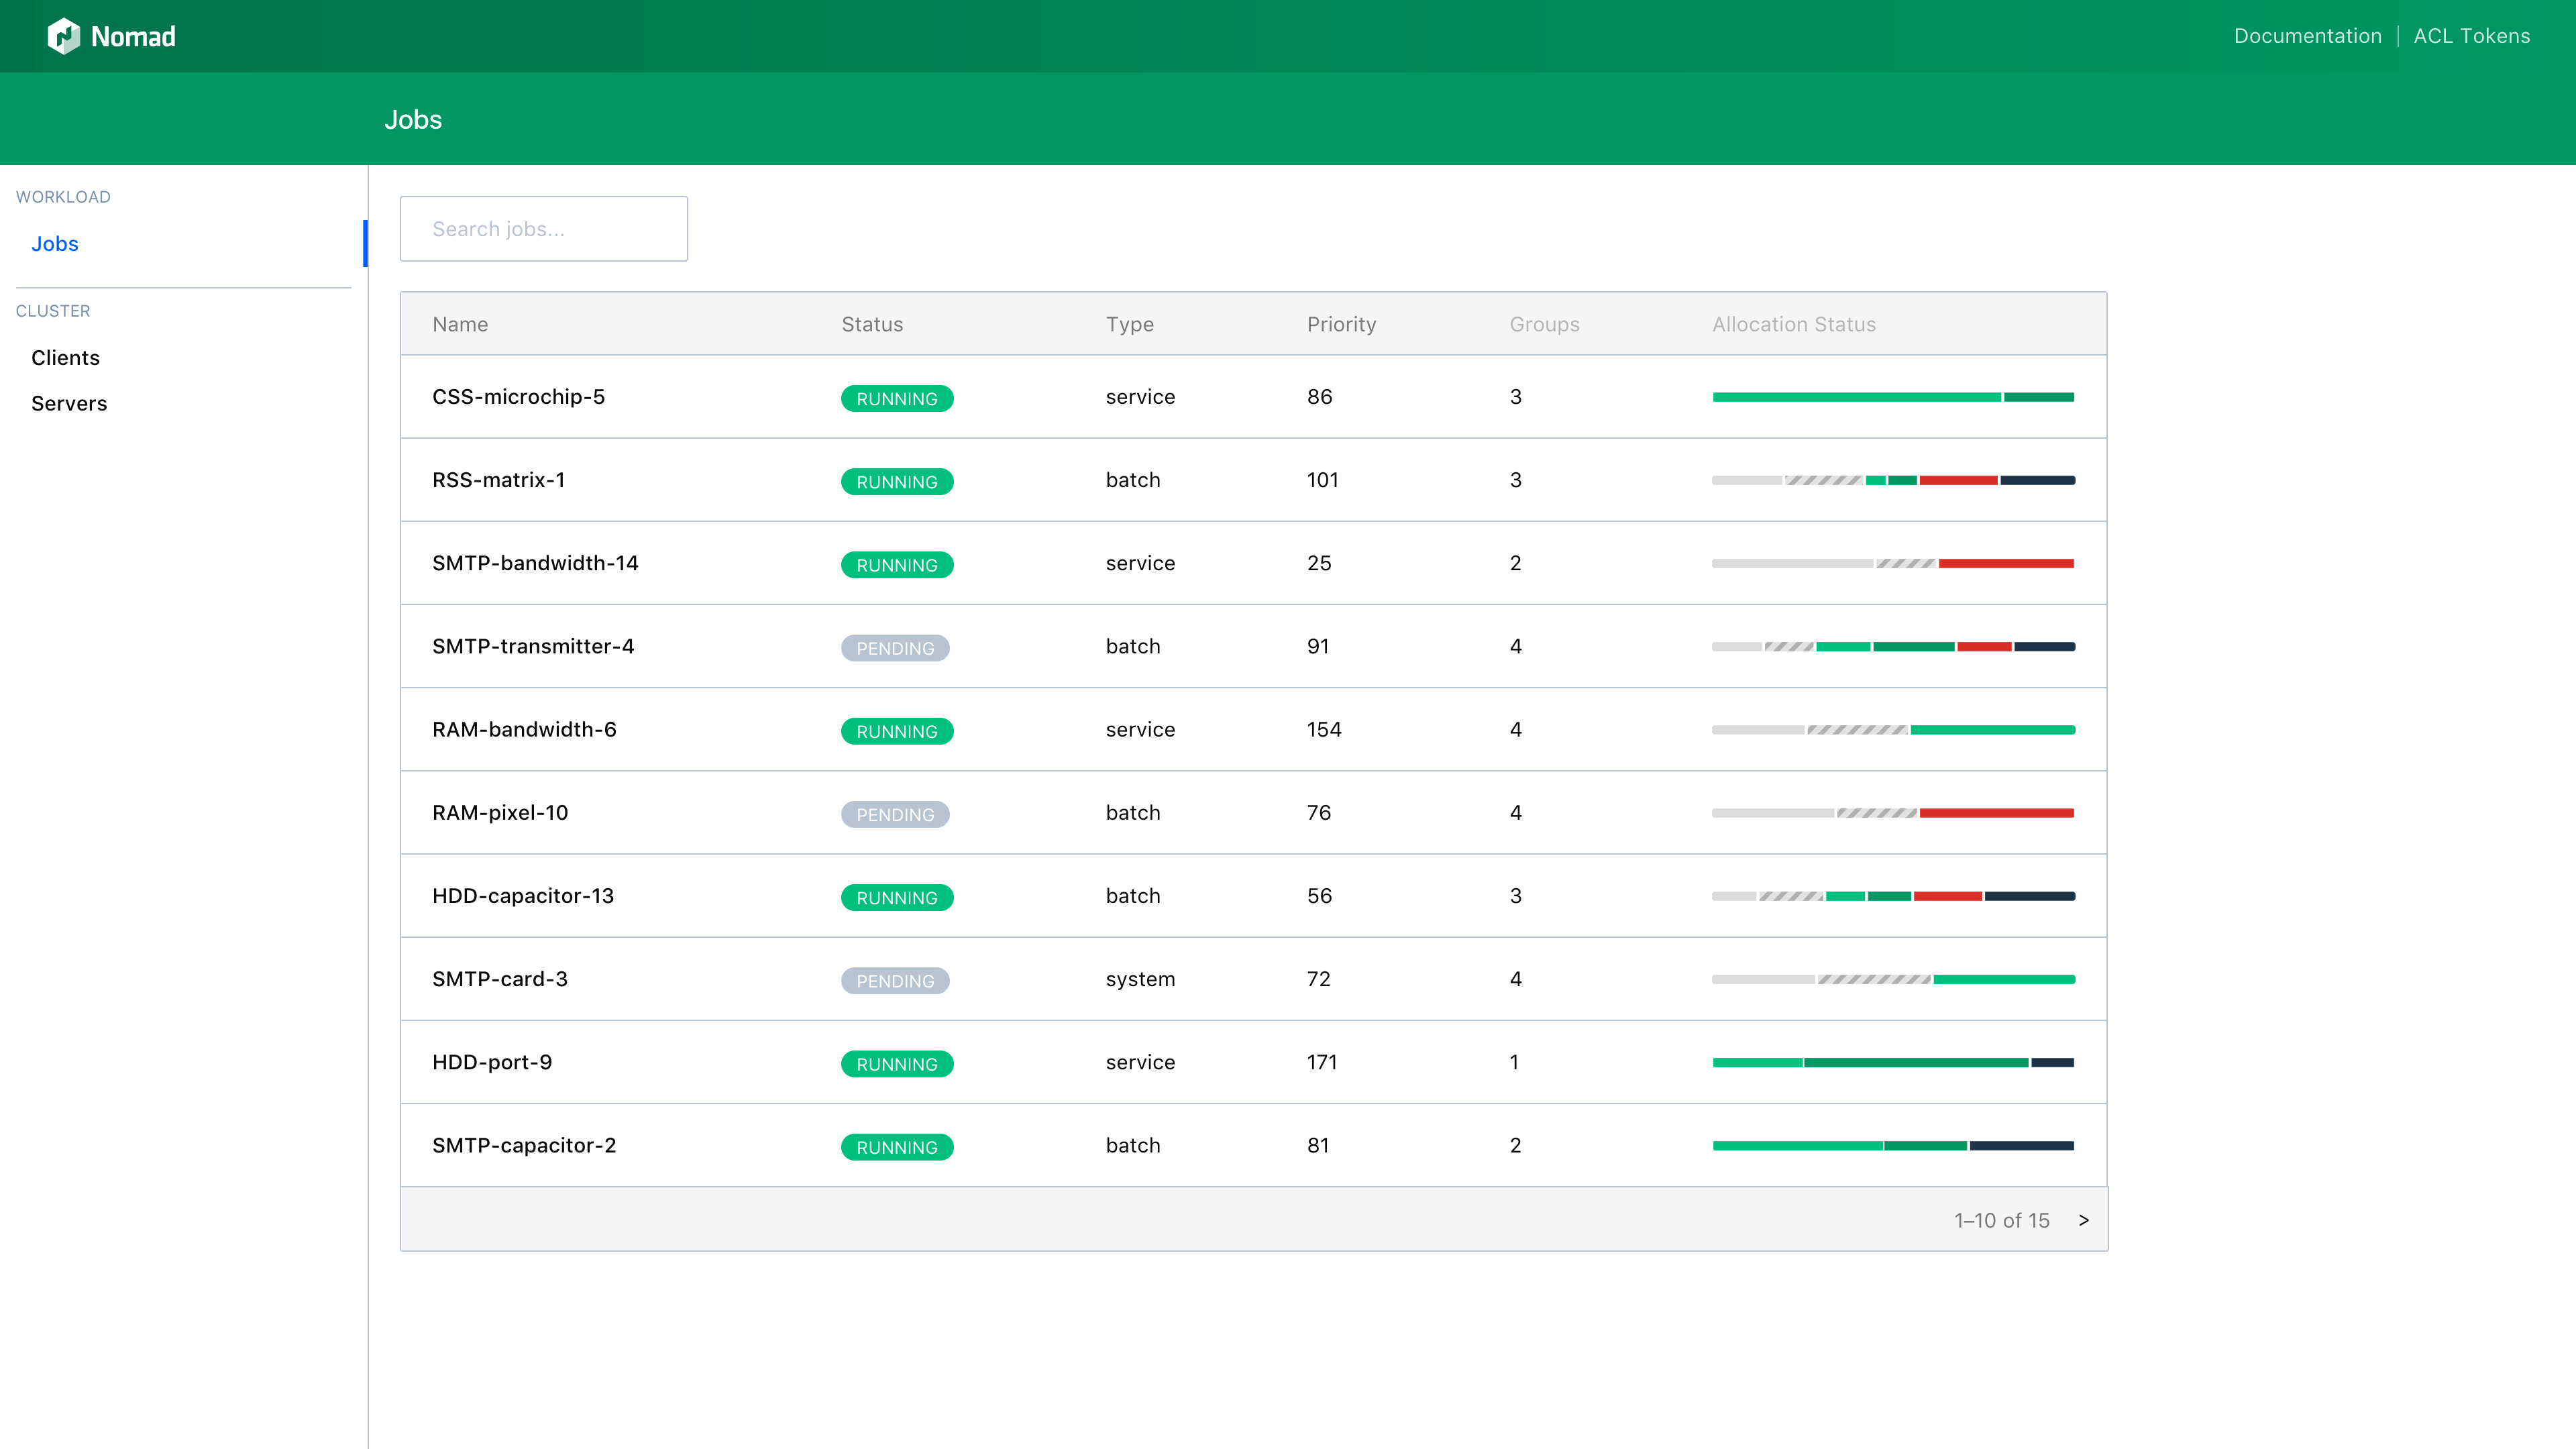
To sort the table, click a table column’s header cell. To search, type a query into the searchbox.
By default the search will fuzzy-match any job name, but by starting a query with a /, the search
will instead be based on a regular expression.
Sort property, sort direction, search term, and page number are all stored as query params to make sharing links easier.
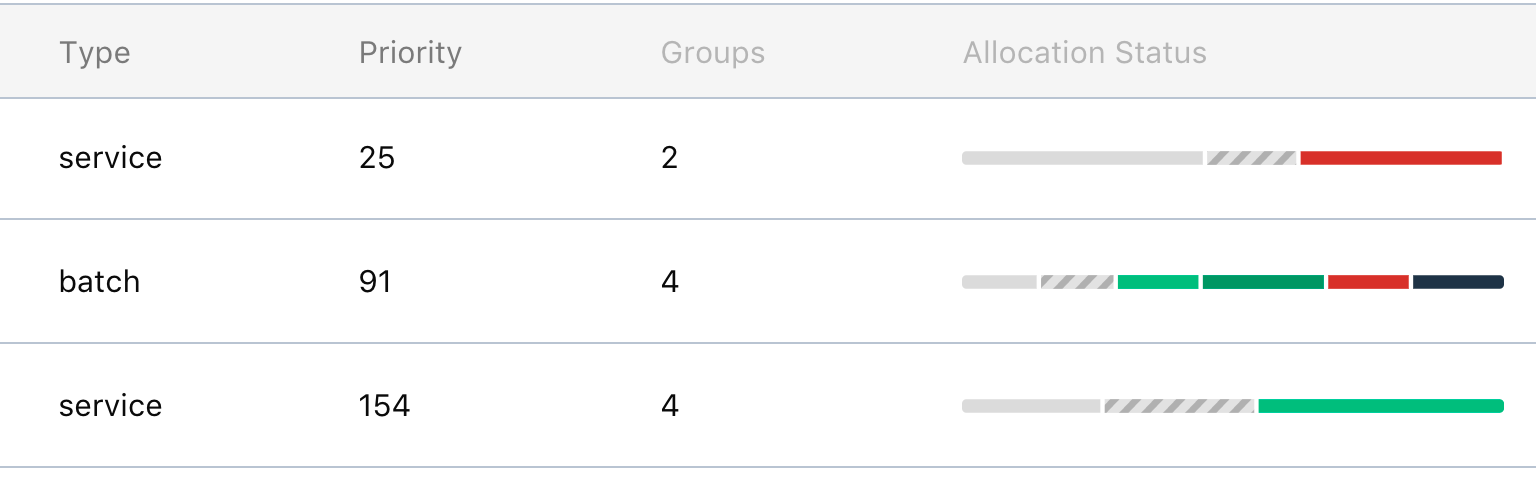
In addition to name, each job in the table includes details such as current status, type, priority, number of task groups, and an aggregation of all allocations by allocation status.
Inspecting a Job
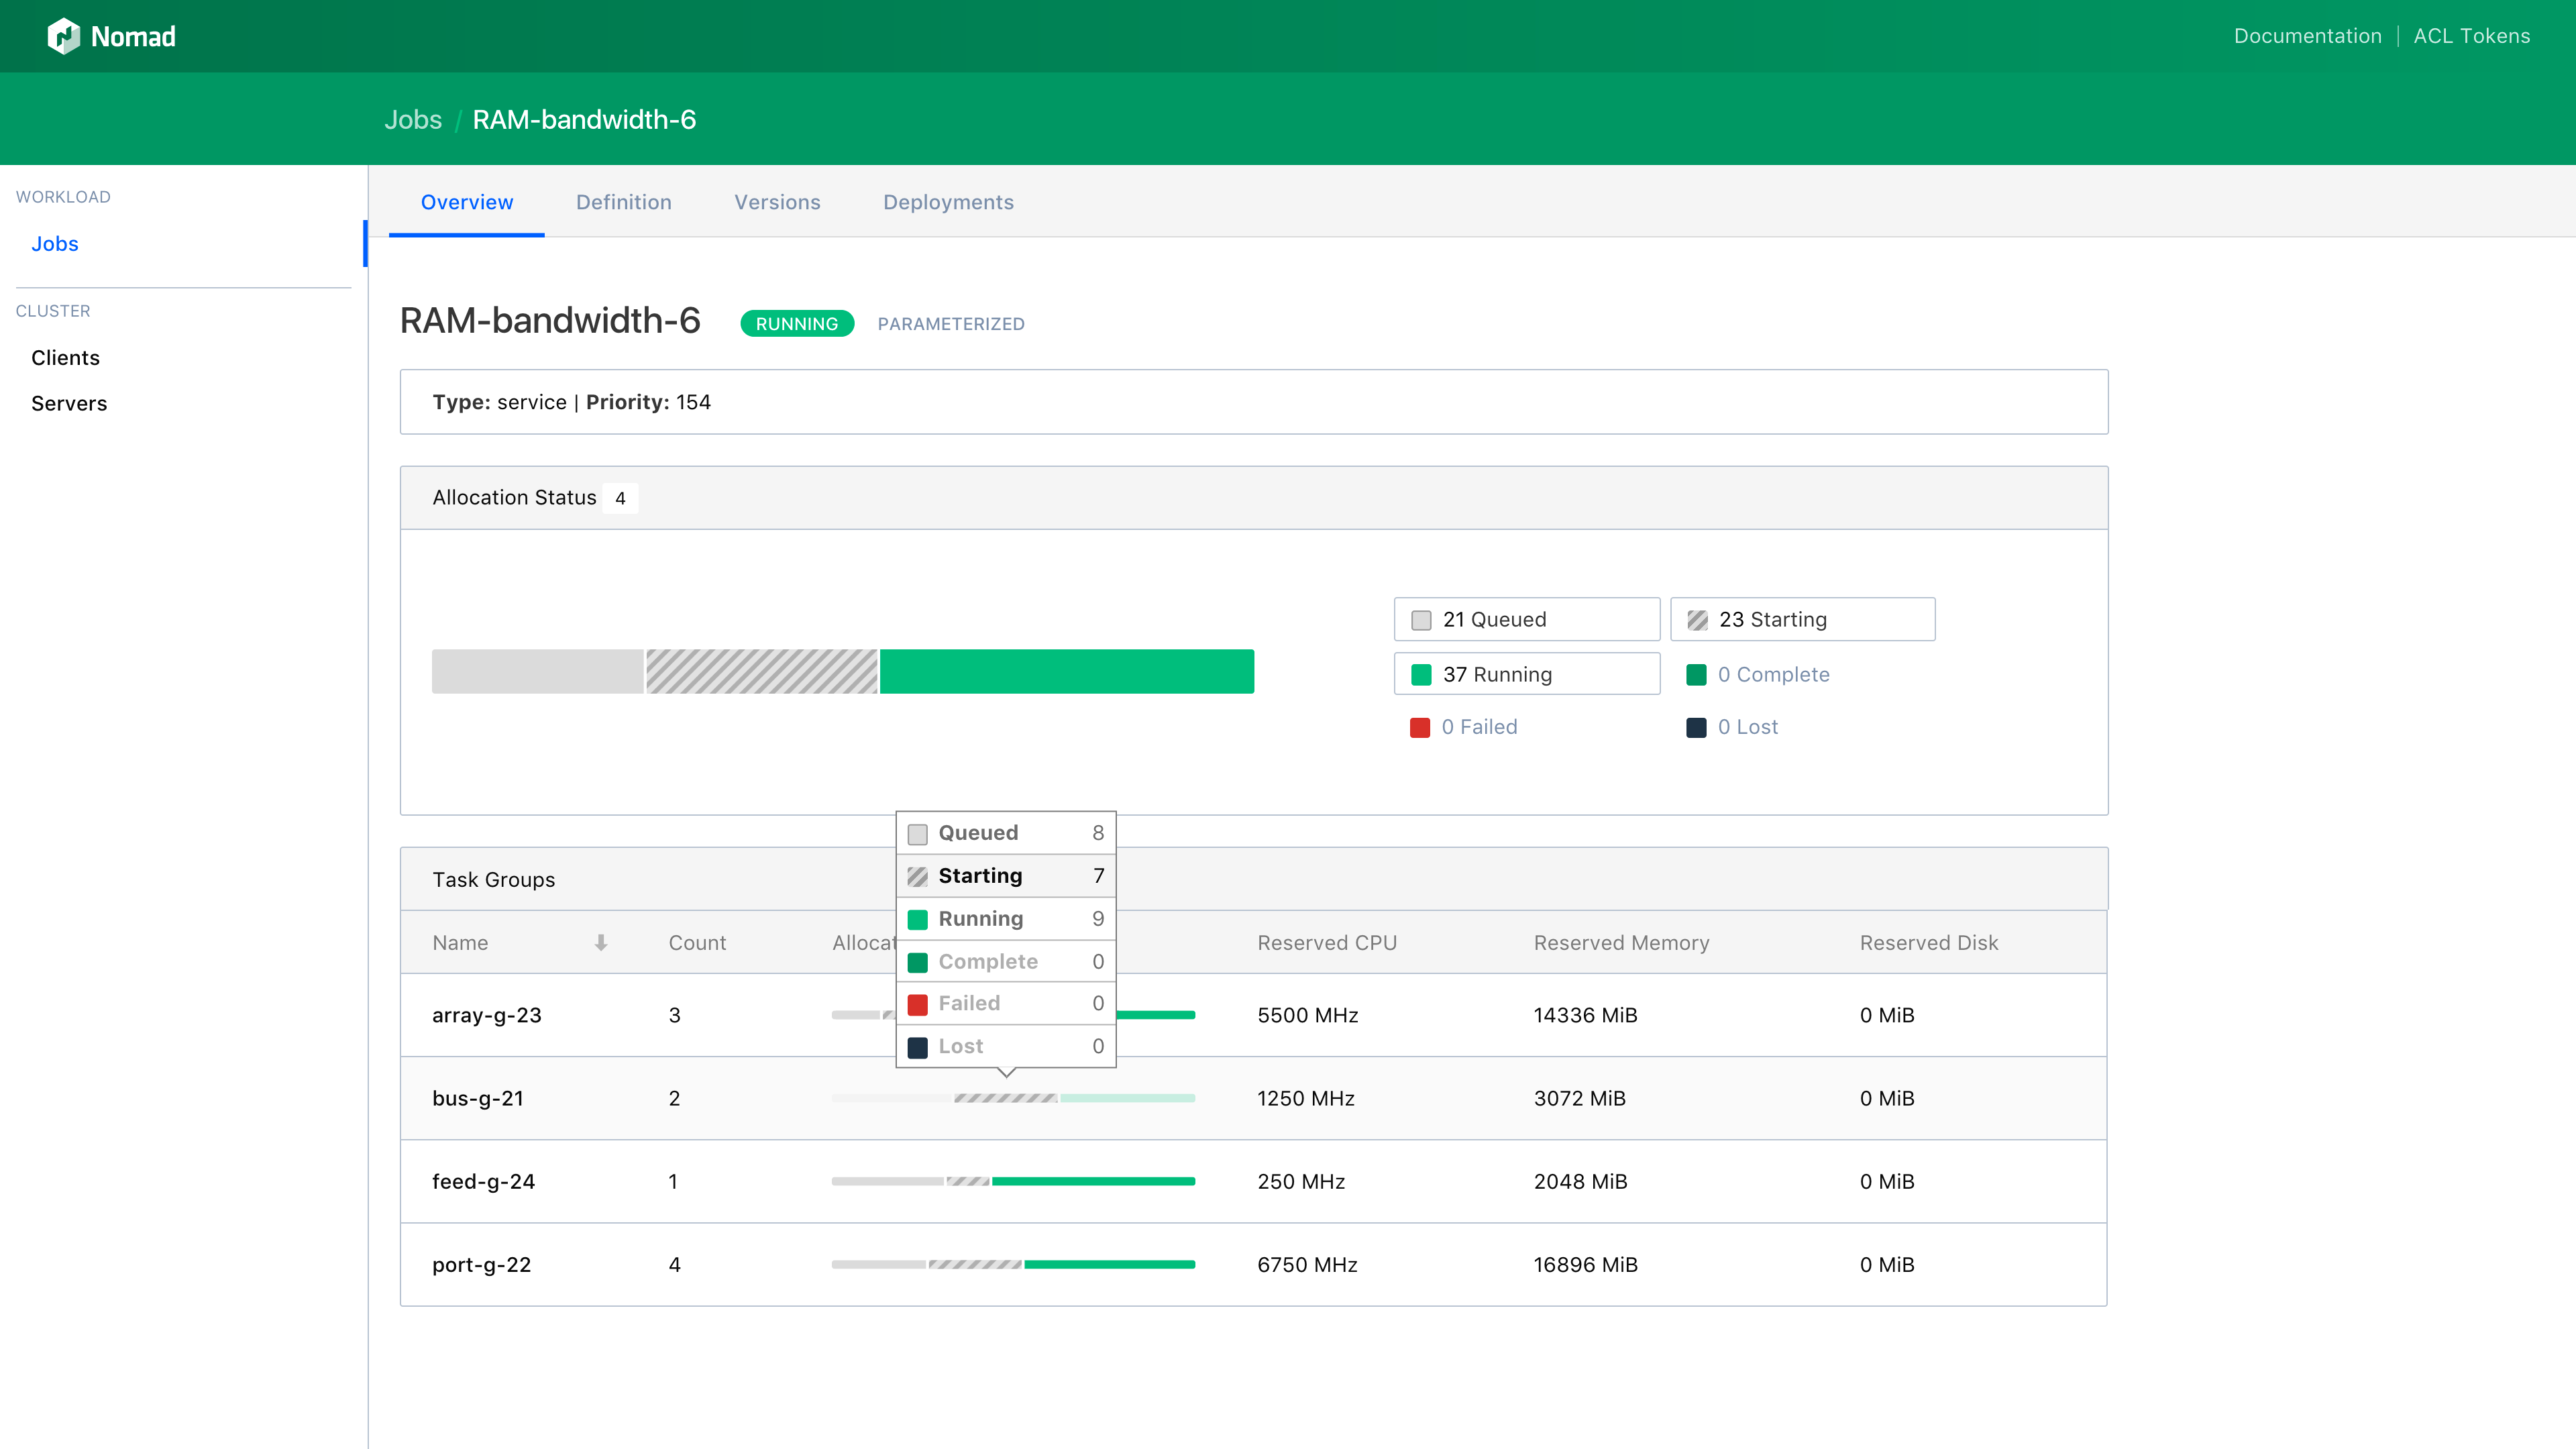
Clicking on a job will navigate to the Job Detail page. This page shows a list of task groups for the job as well as the status of each allocation for each task group by allocation status.
Let’s create our job and see how we can use the Nomad UI to inspect it.
nomad init
nomad run example.nomad
Now that our job has been created, click in the image below to see the details.
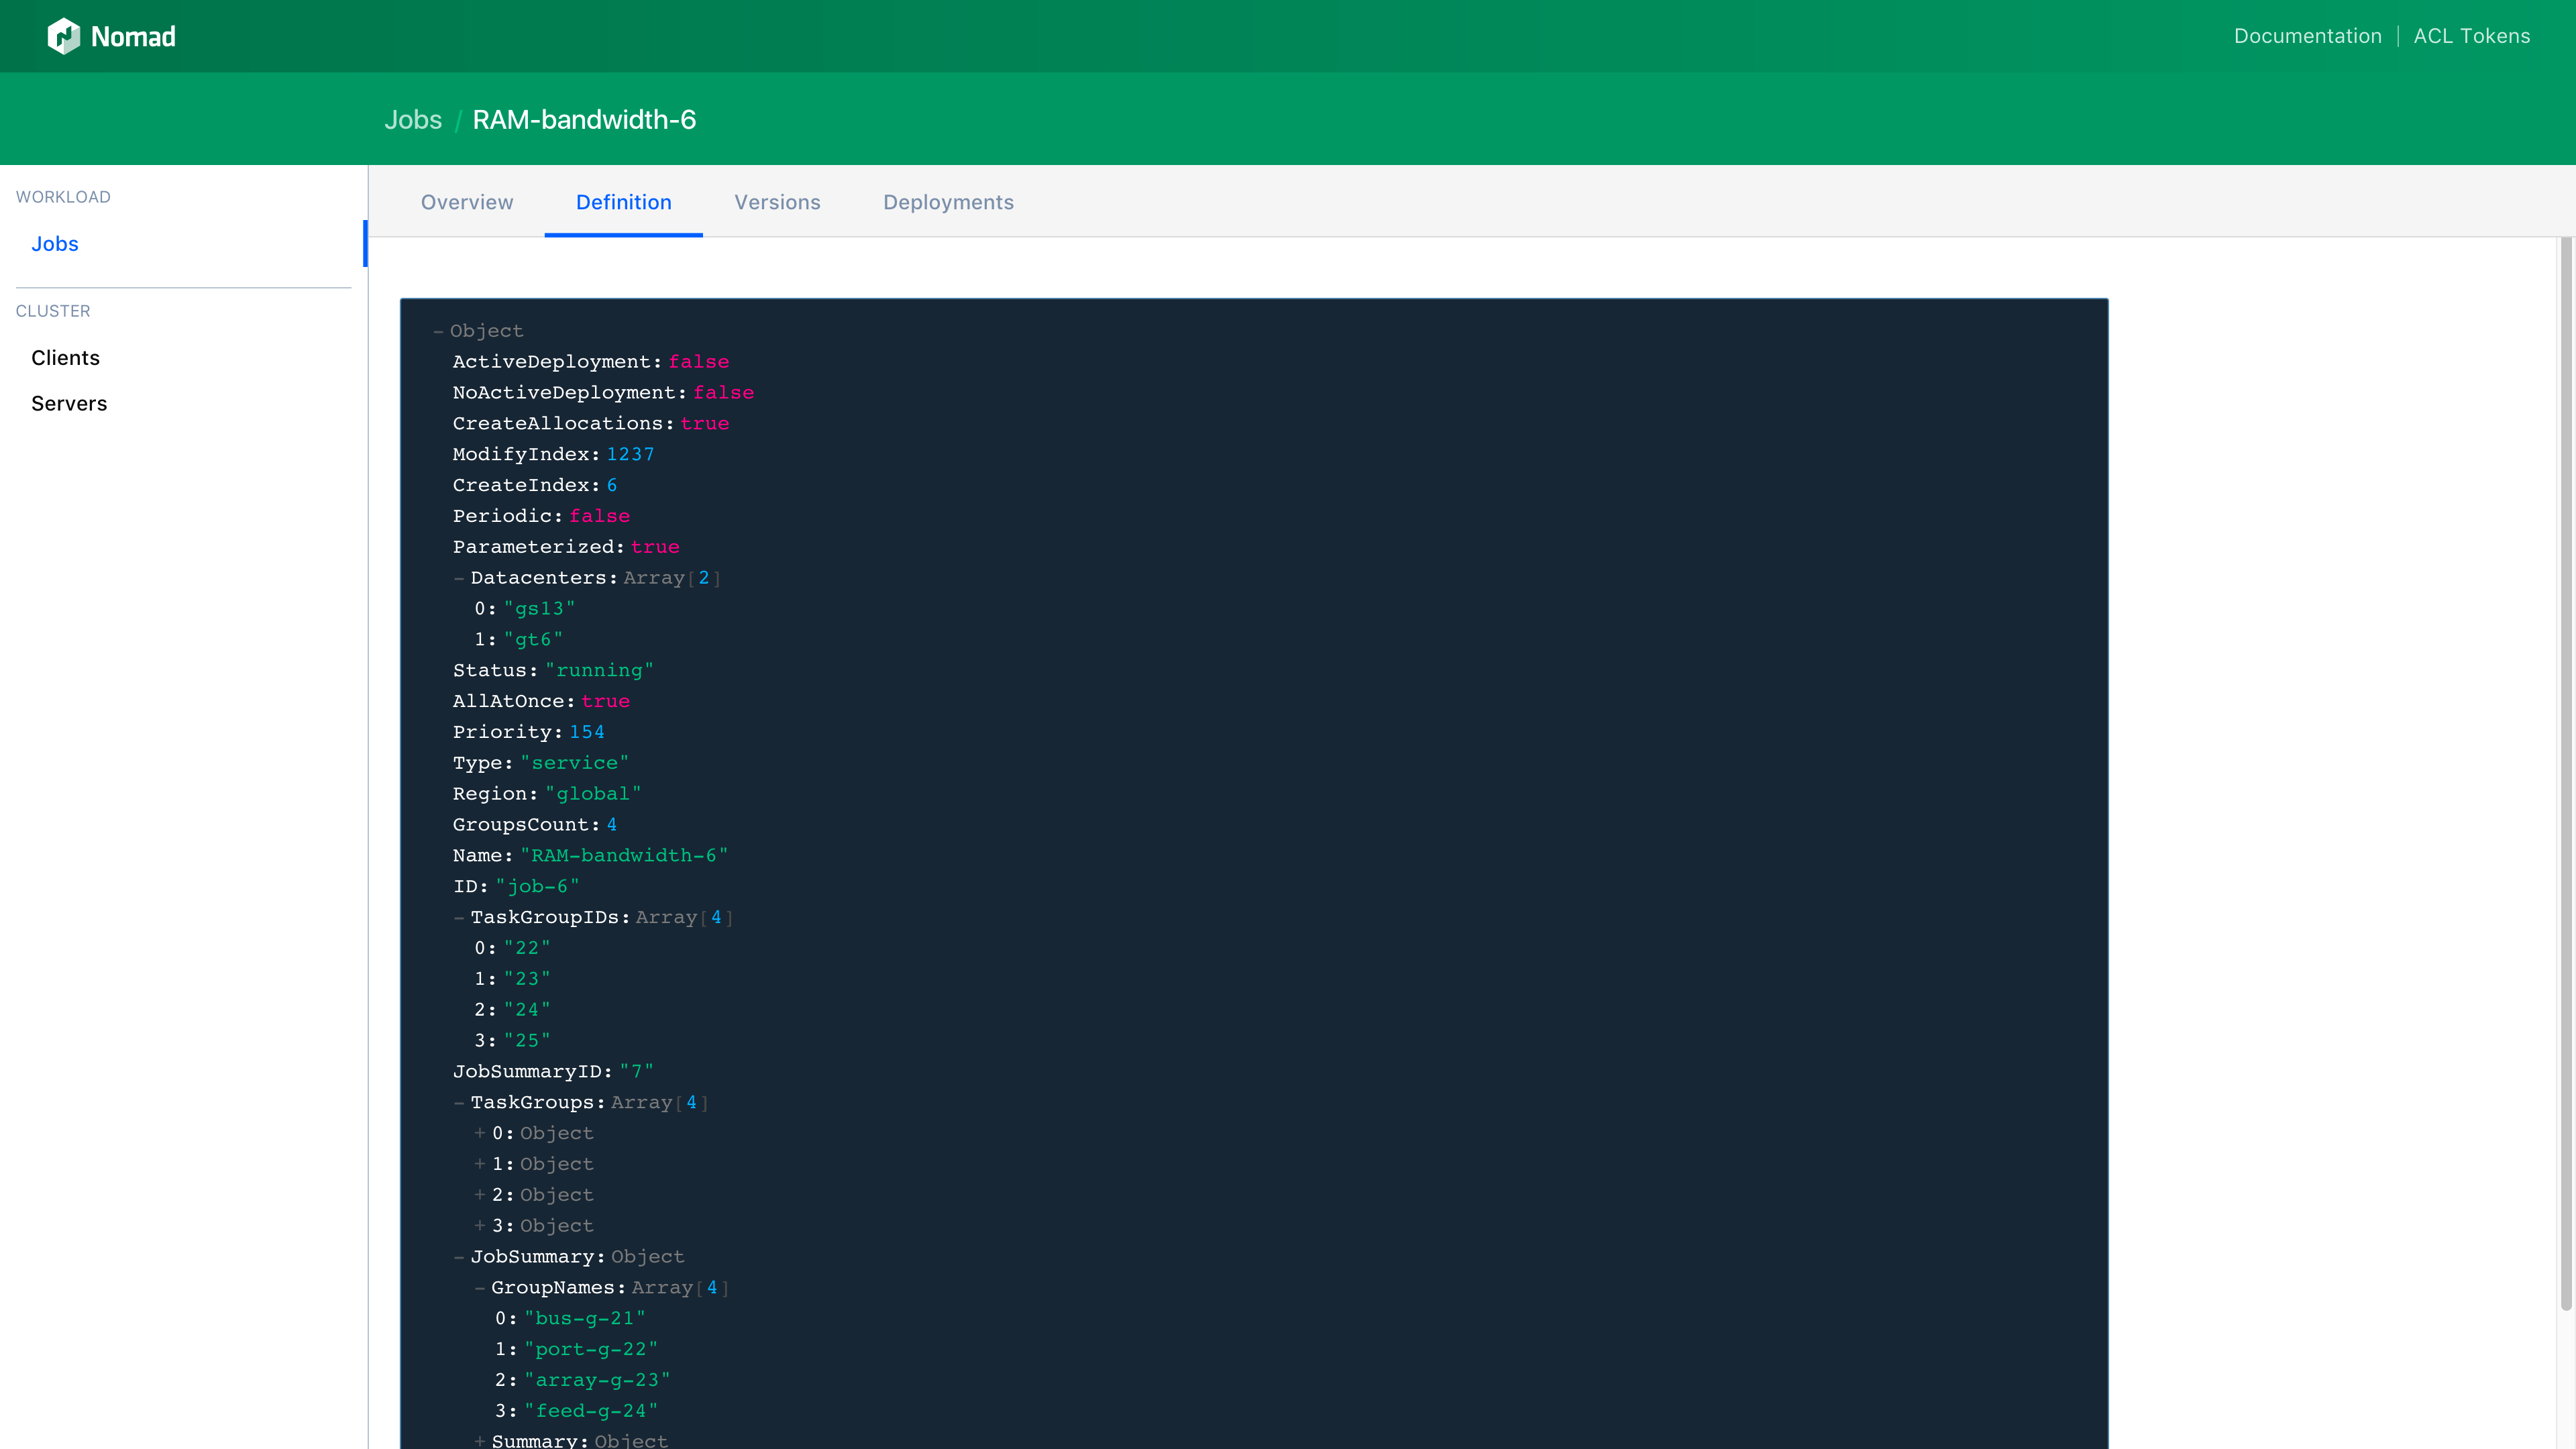
Reading a Job Definition
The Job Detail page has multiple tabs, one of which is Definition. On the Definition page, the full job definition is shown as an interactive JSON object.
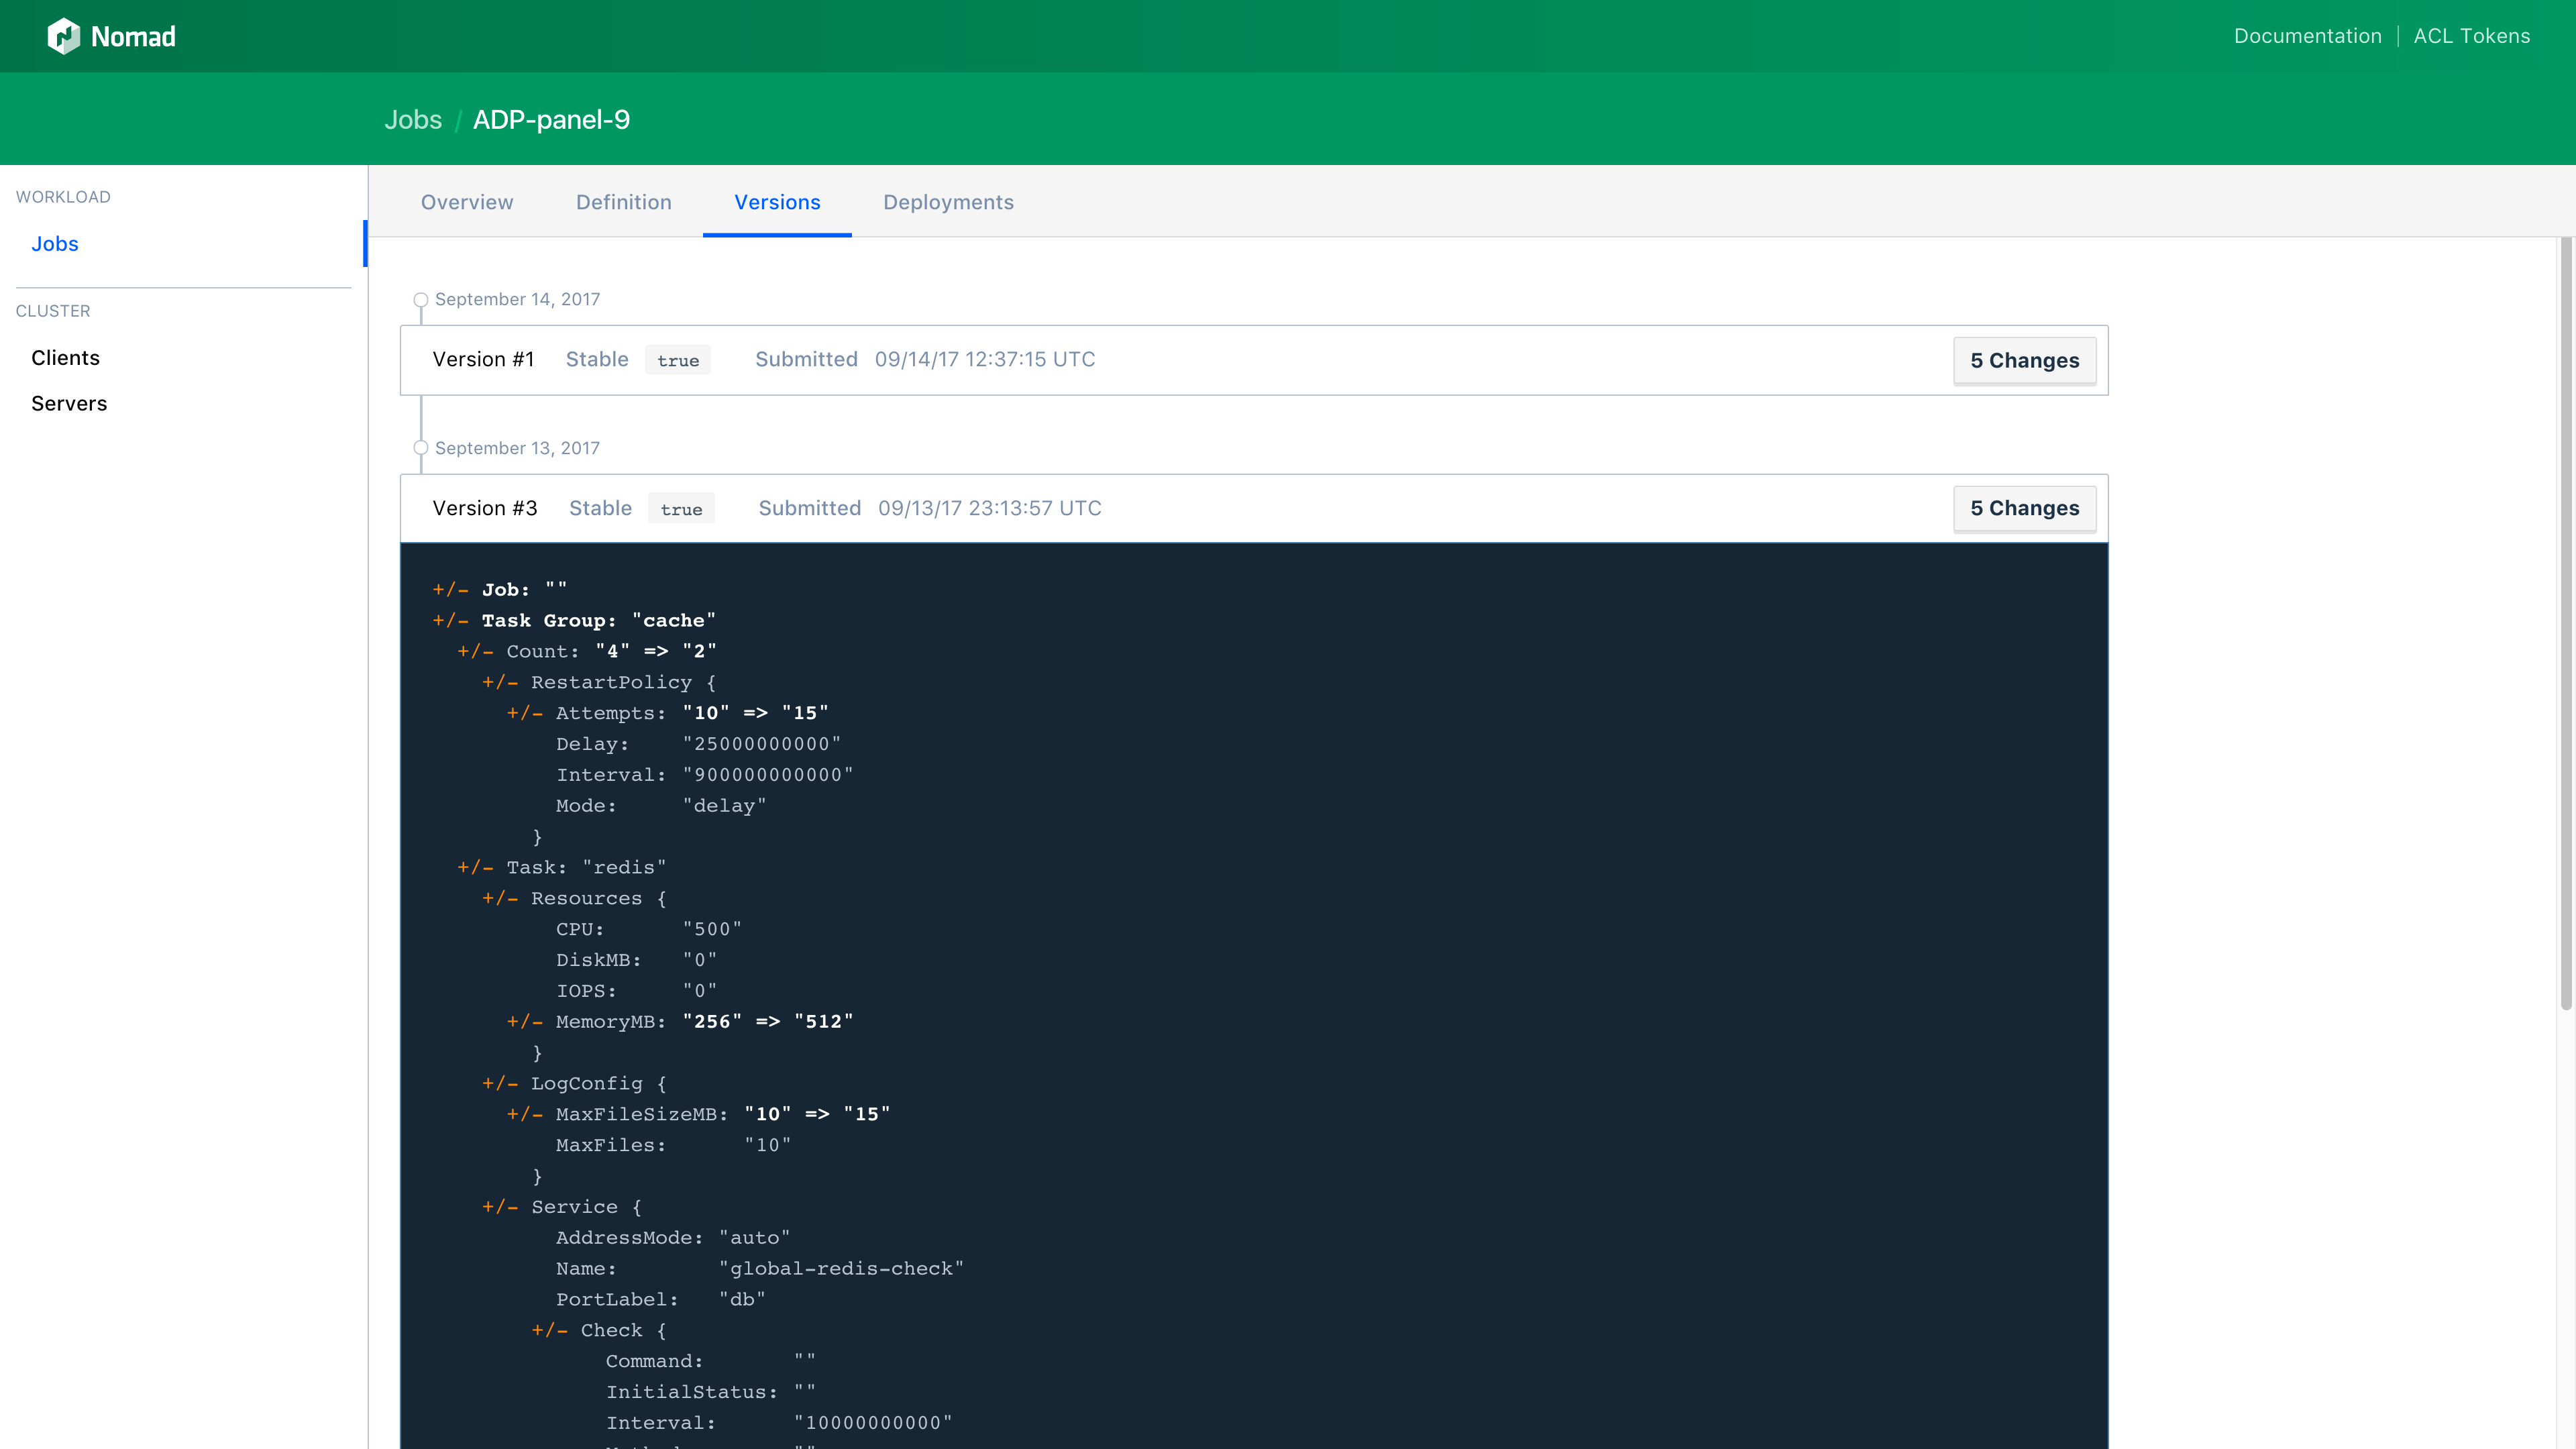
Reviewing Past Job Versions
Job Versions can be found on the Versions tab on the Job Detail page. This page has a timeline view of every tracked version for the job.
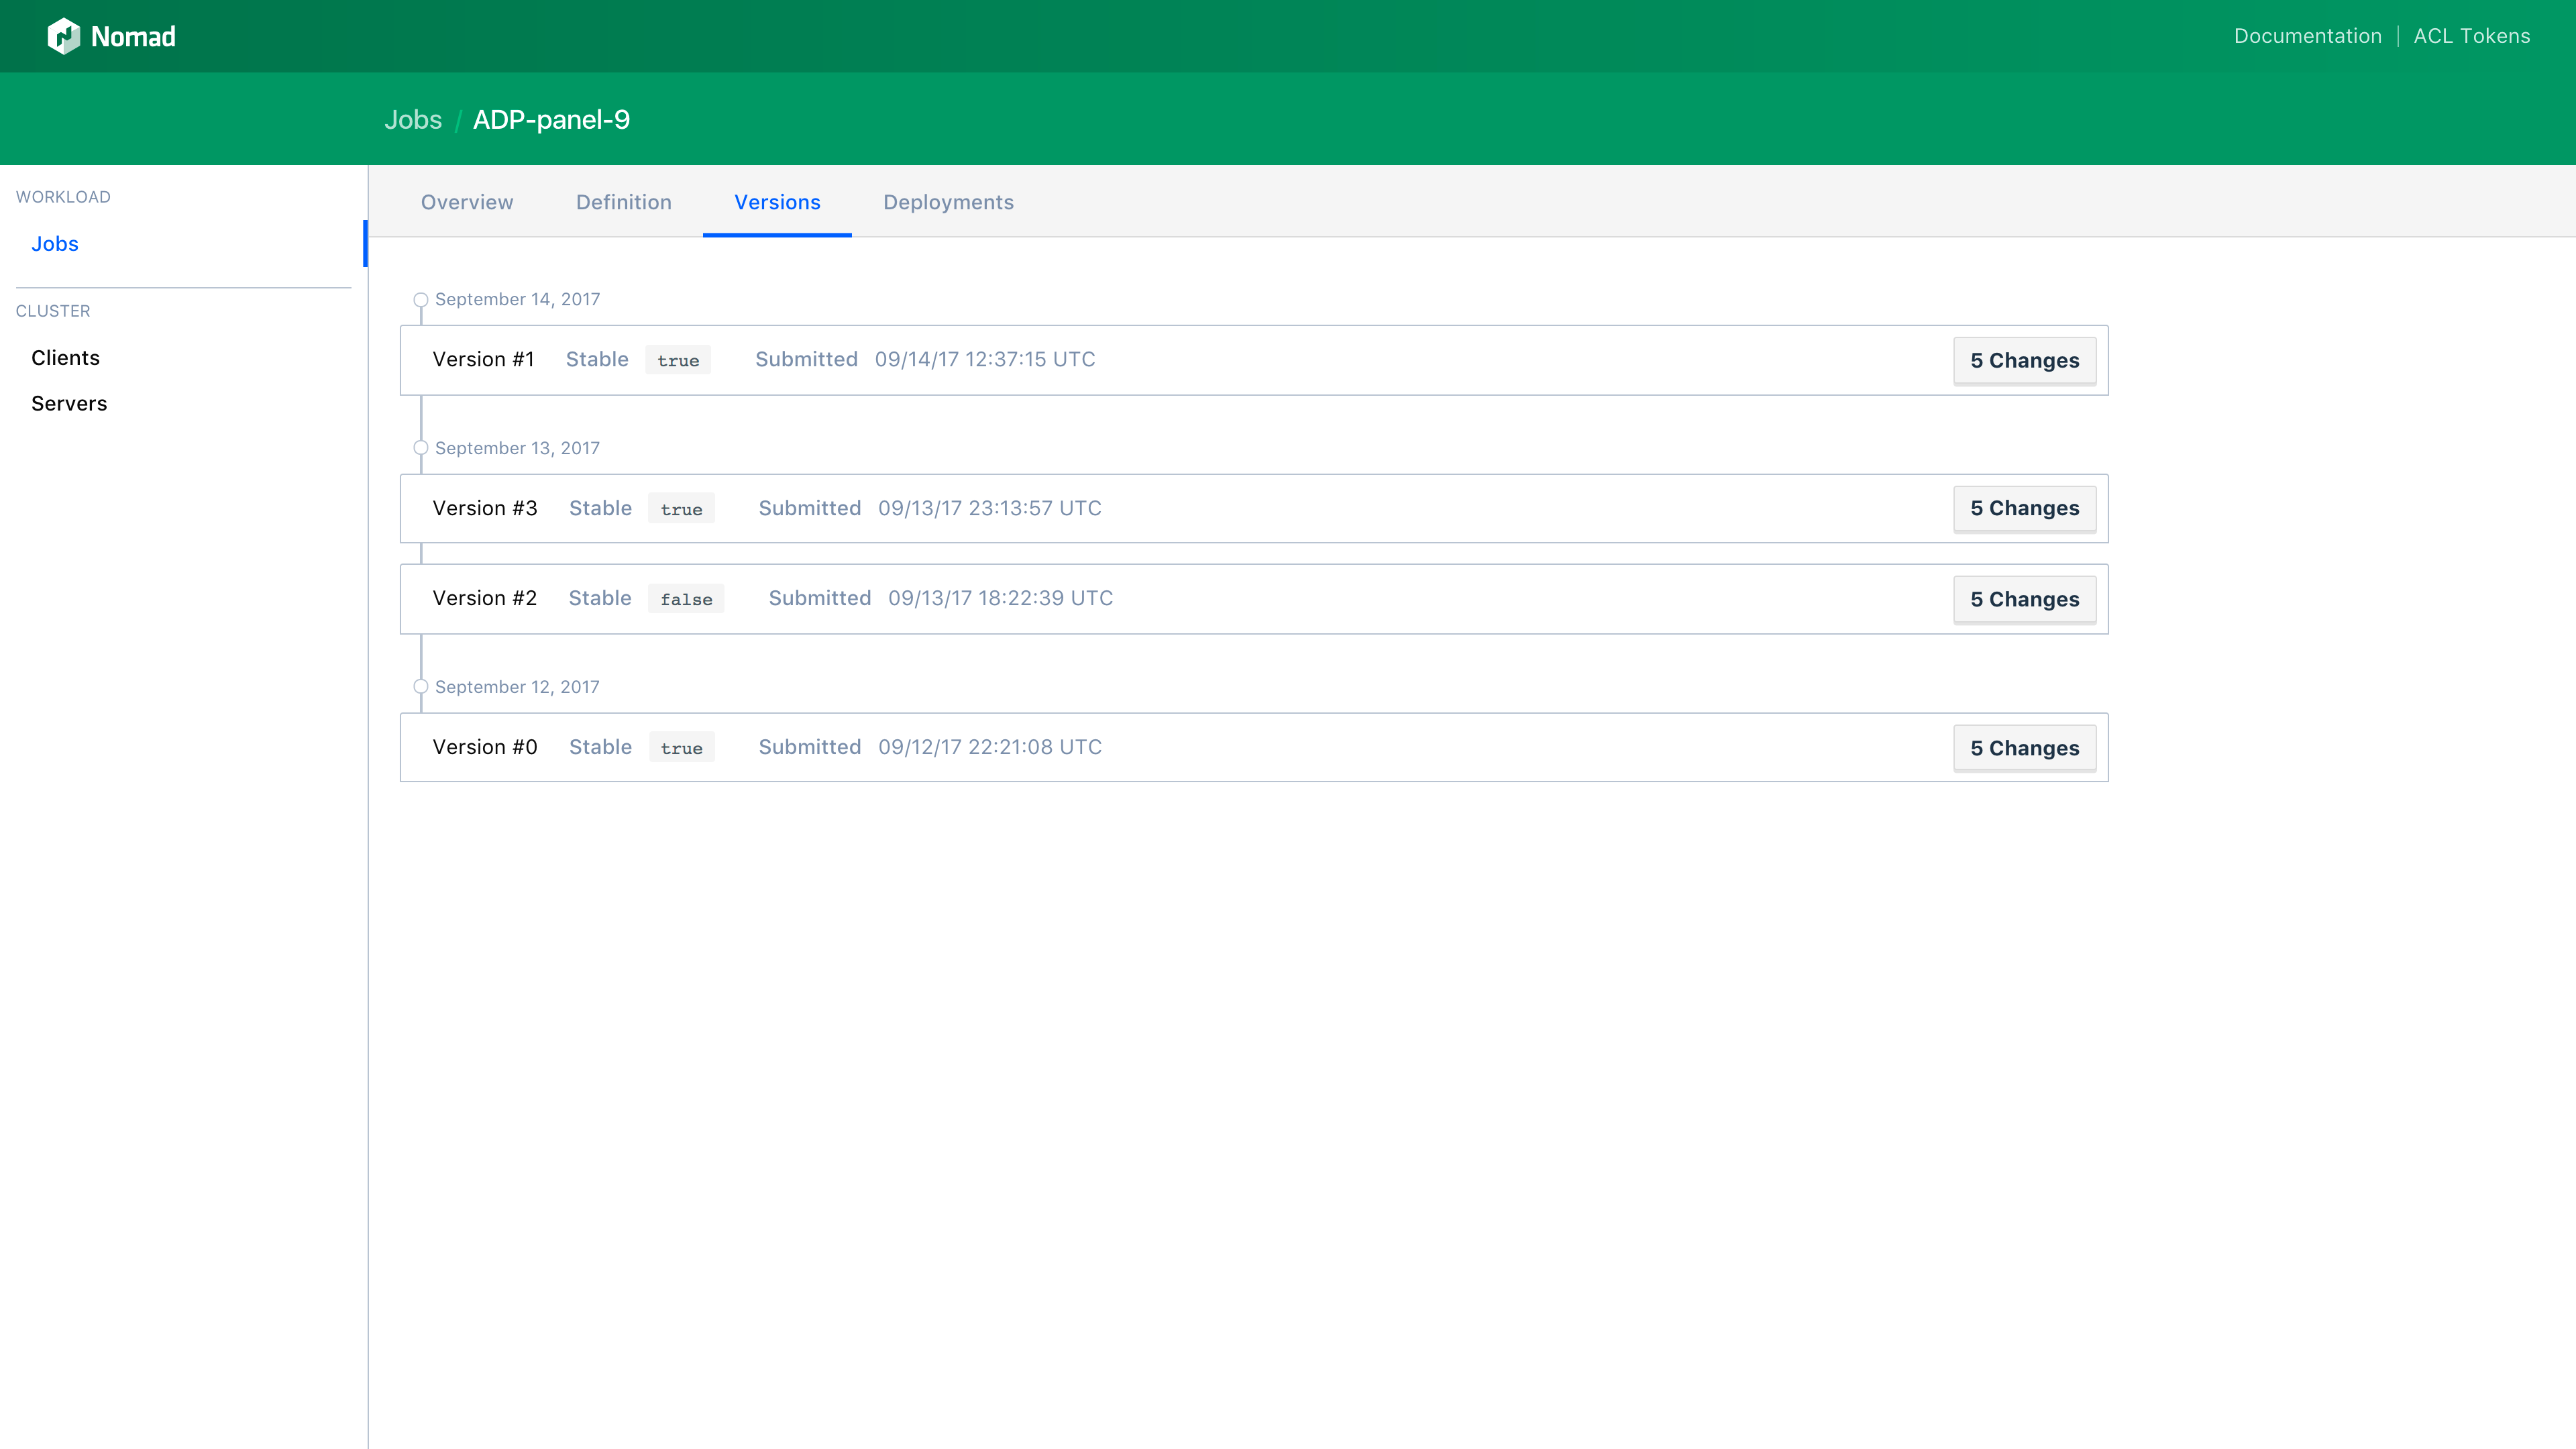
Each version can be toggled to also show the diff between job versions.
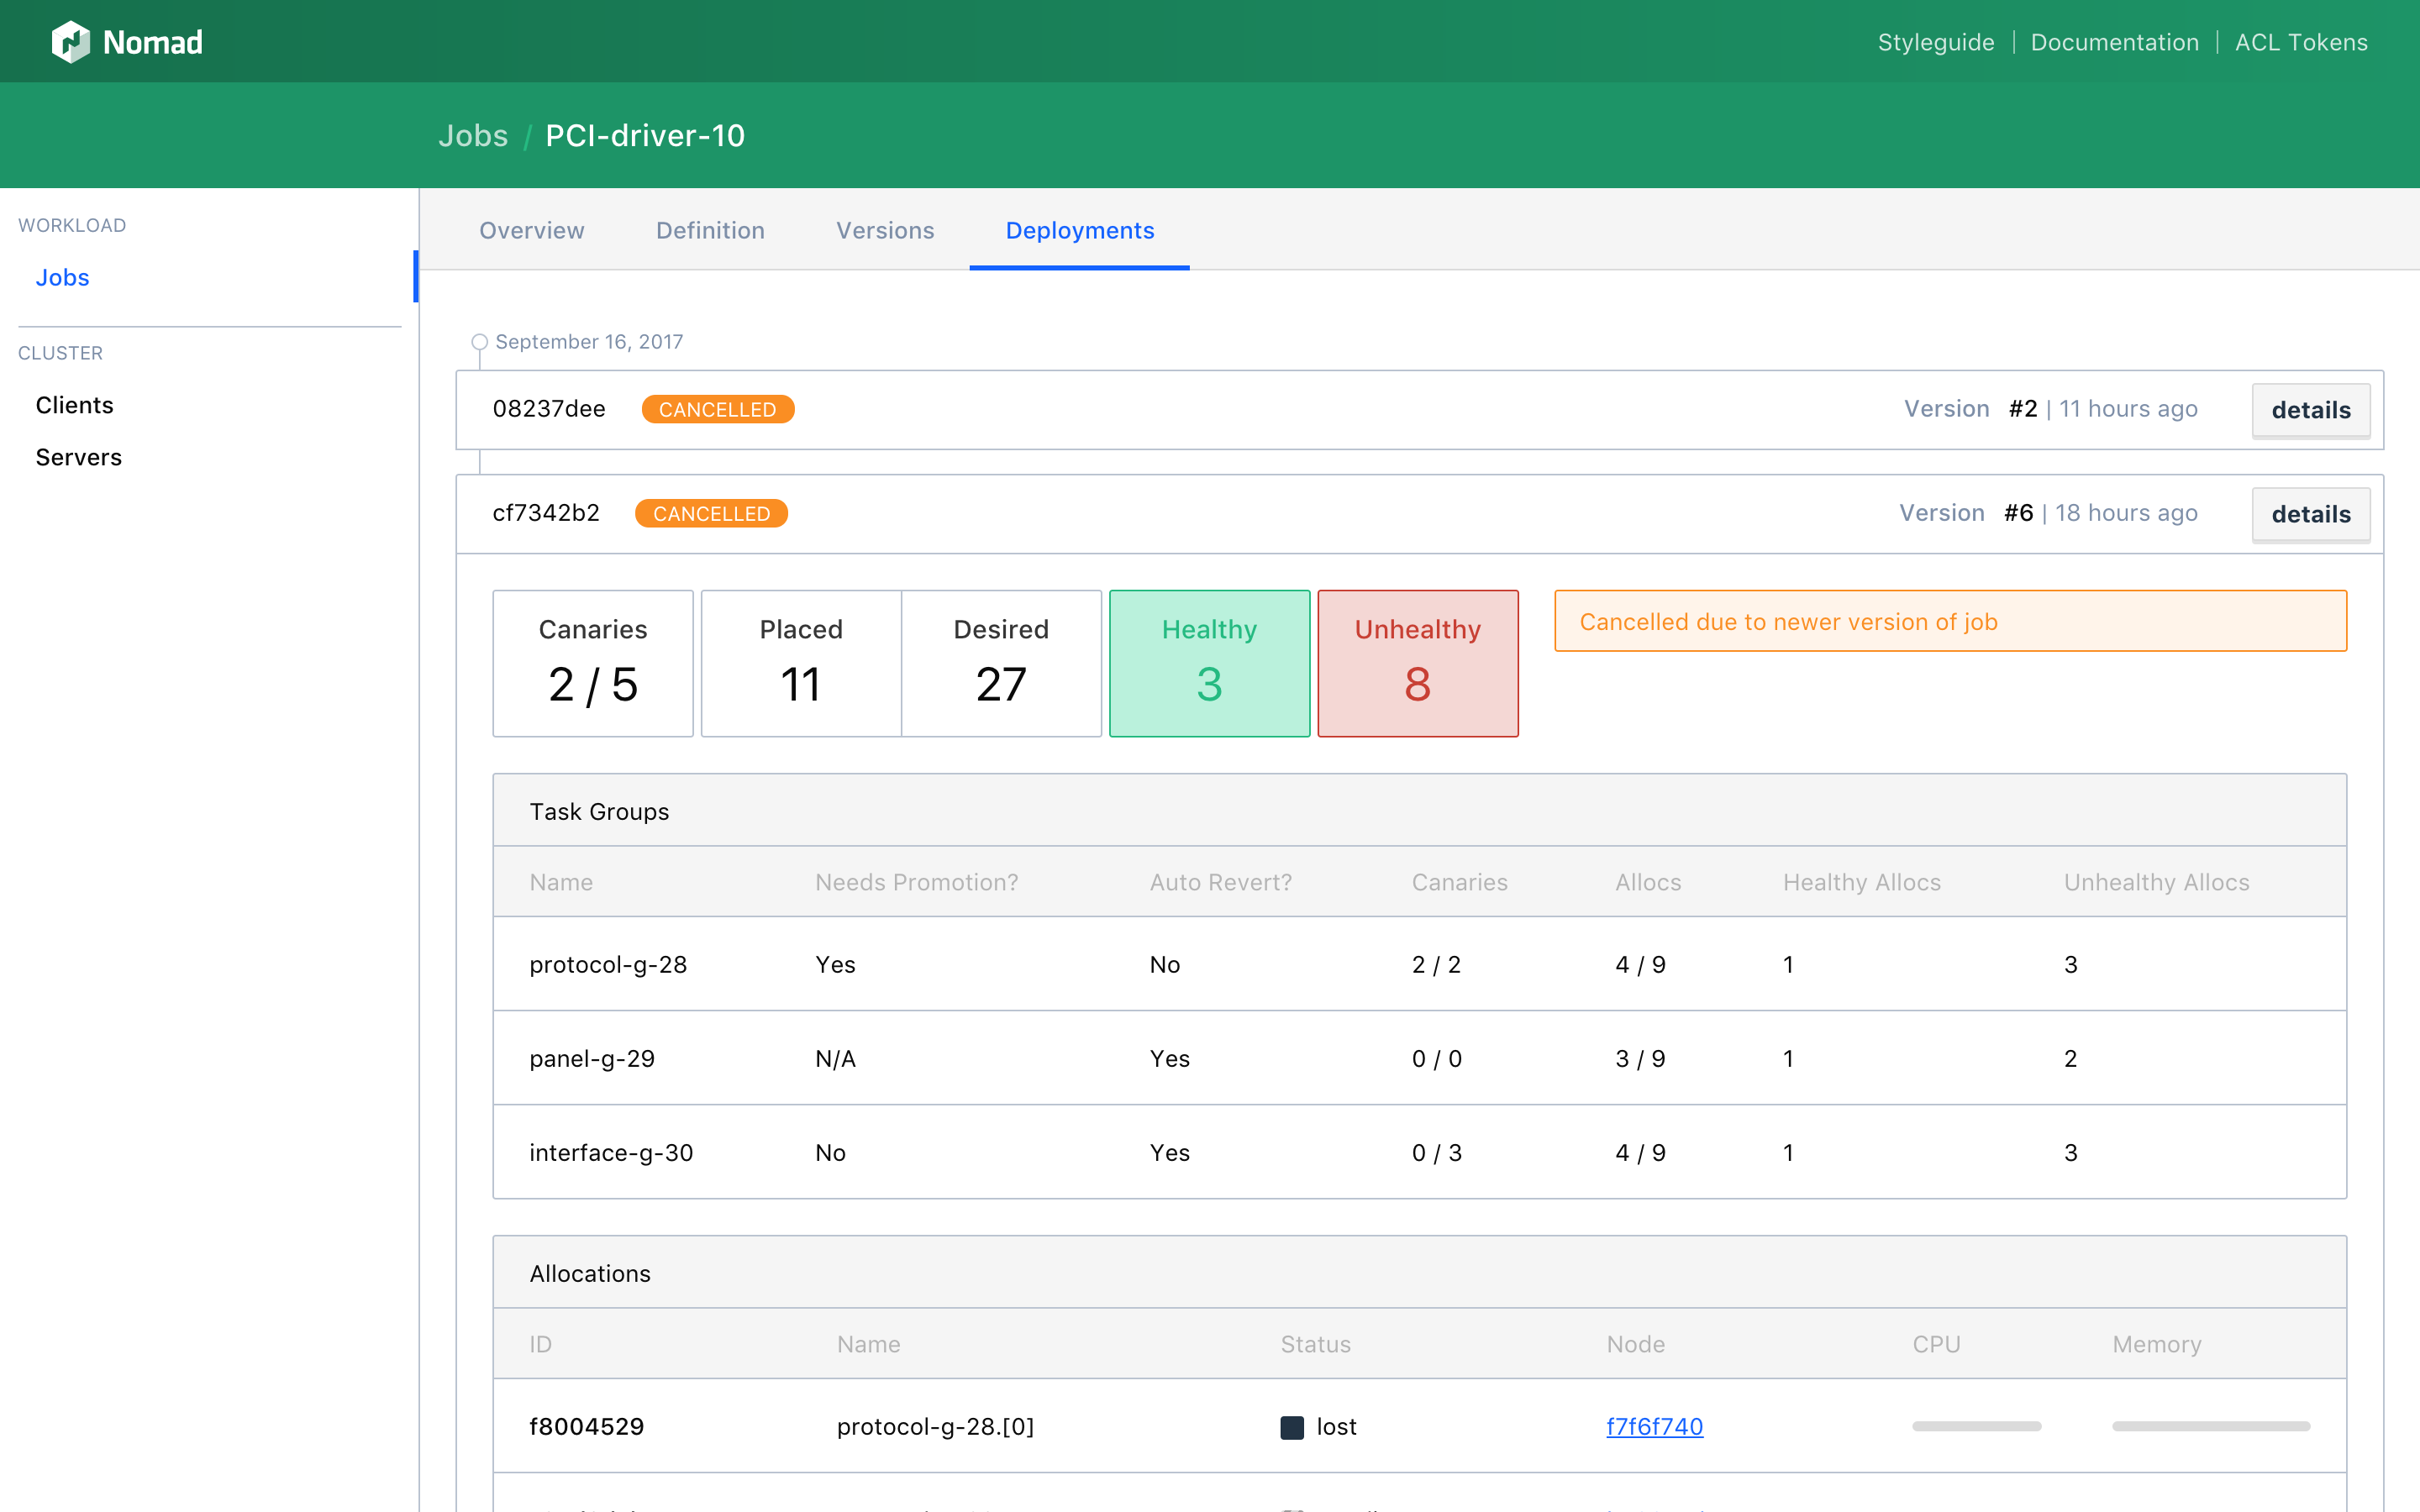
Reviewing Past Job Deployments
Job Deployments are listed on the Deployments tab on the Job Detail page. Every tracked deployment is listed in a timeline view.
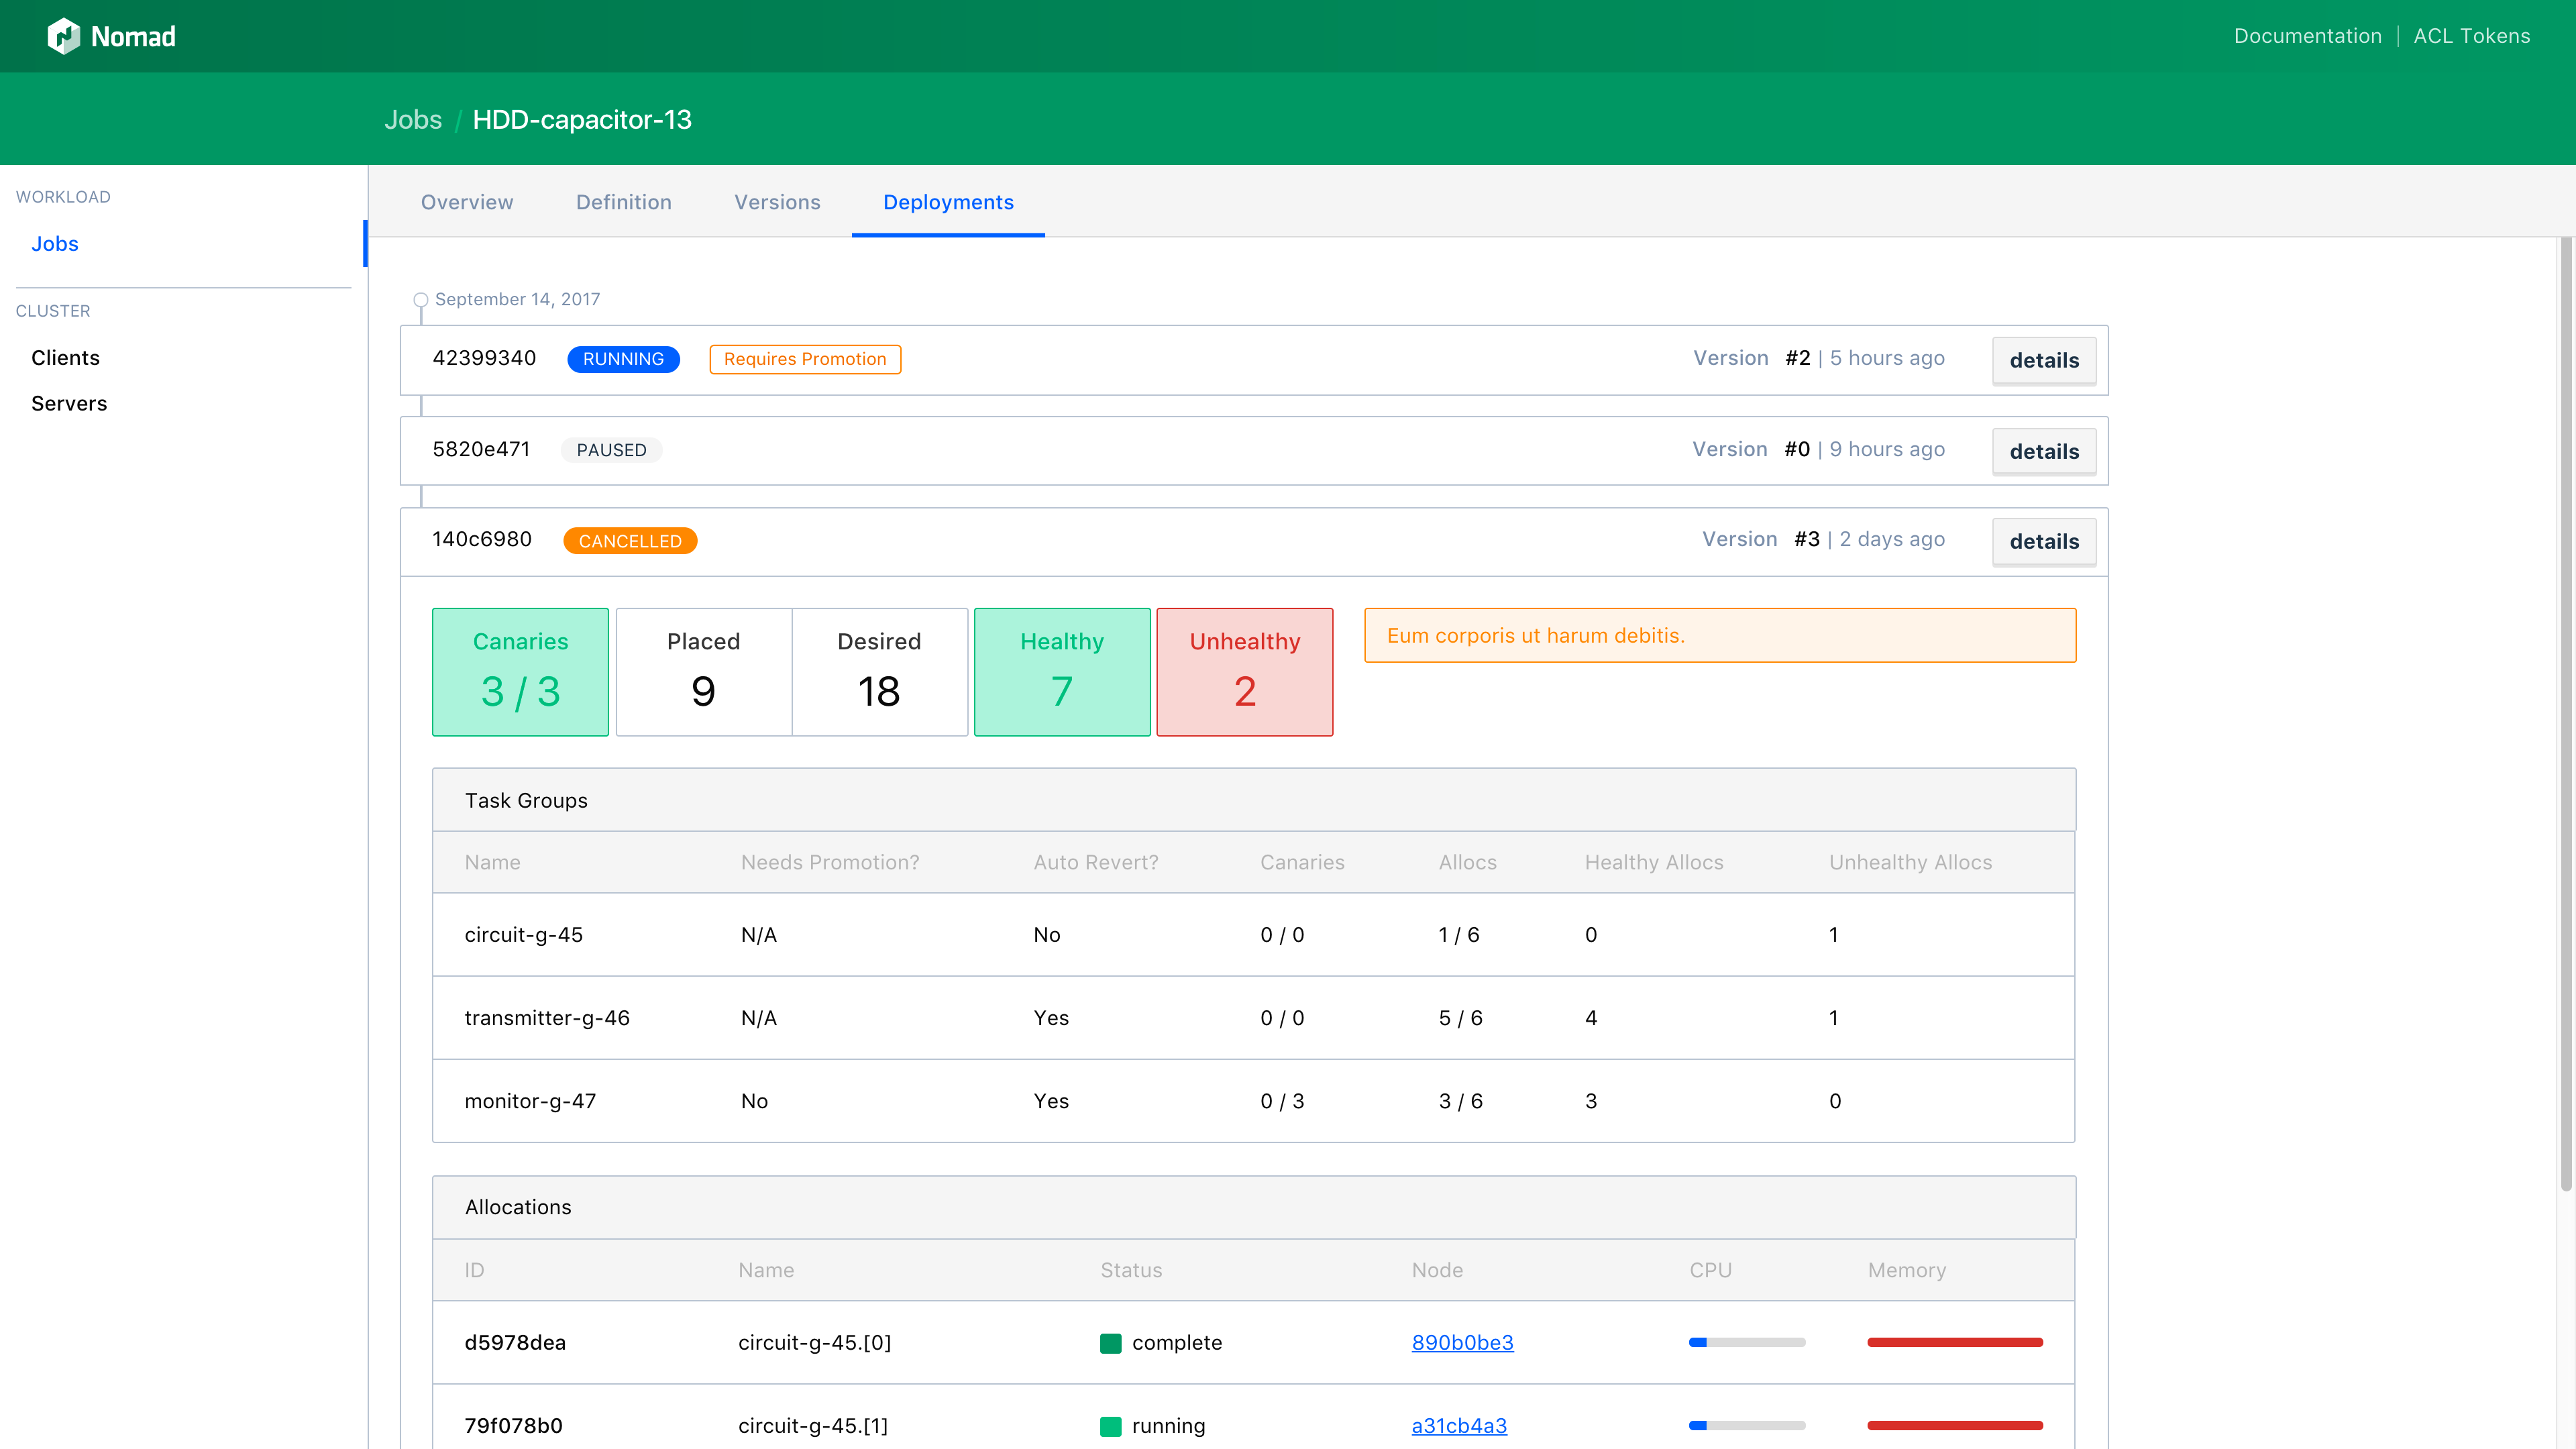
Each deployment can be toggle to show information about the deployment, including canaries placed and desired, allocations placed and desired, healthy and unhealthy allocations, task group metrics, and existing allocations.
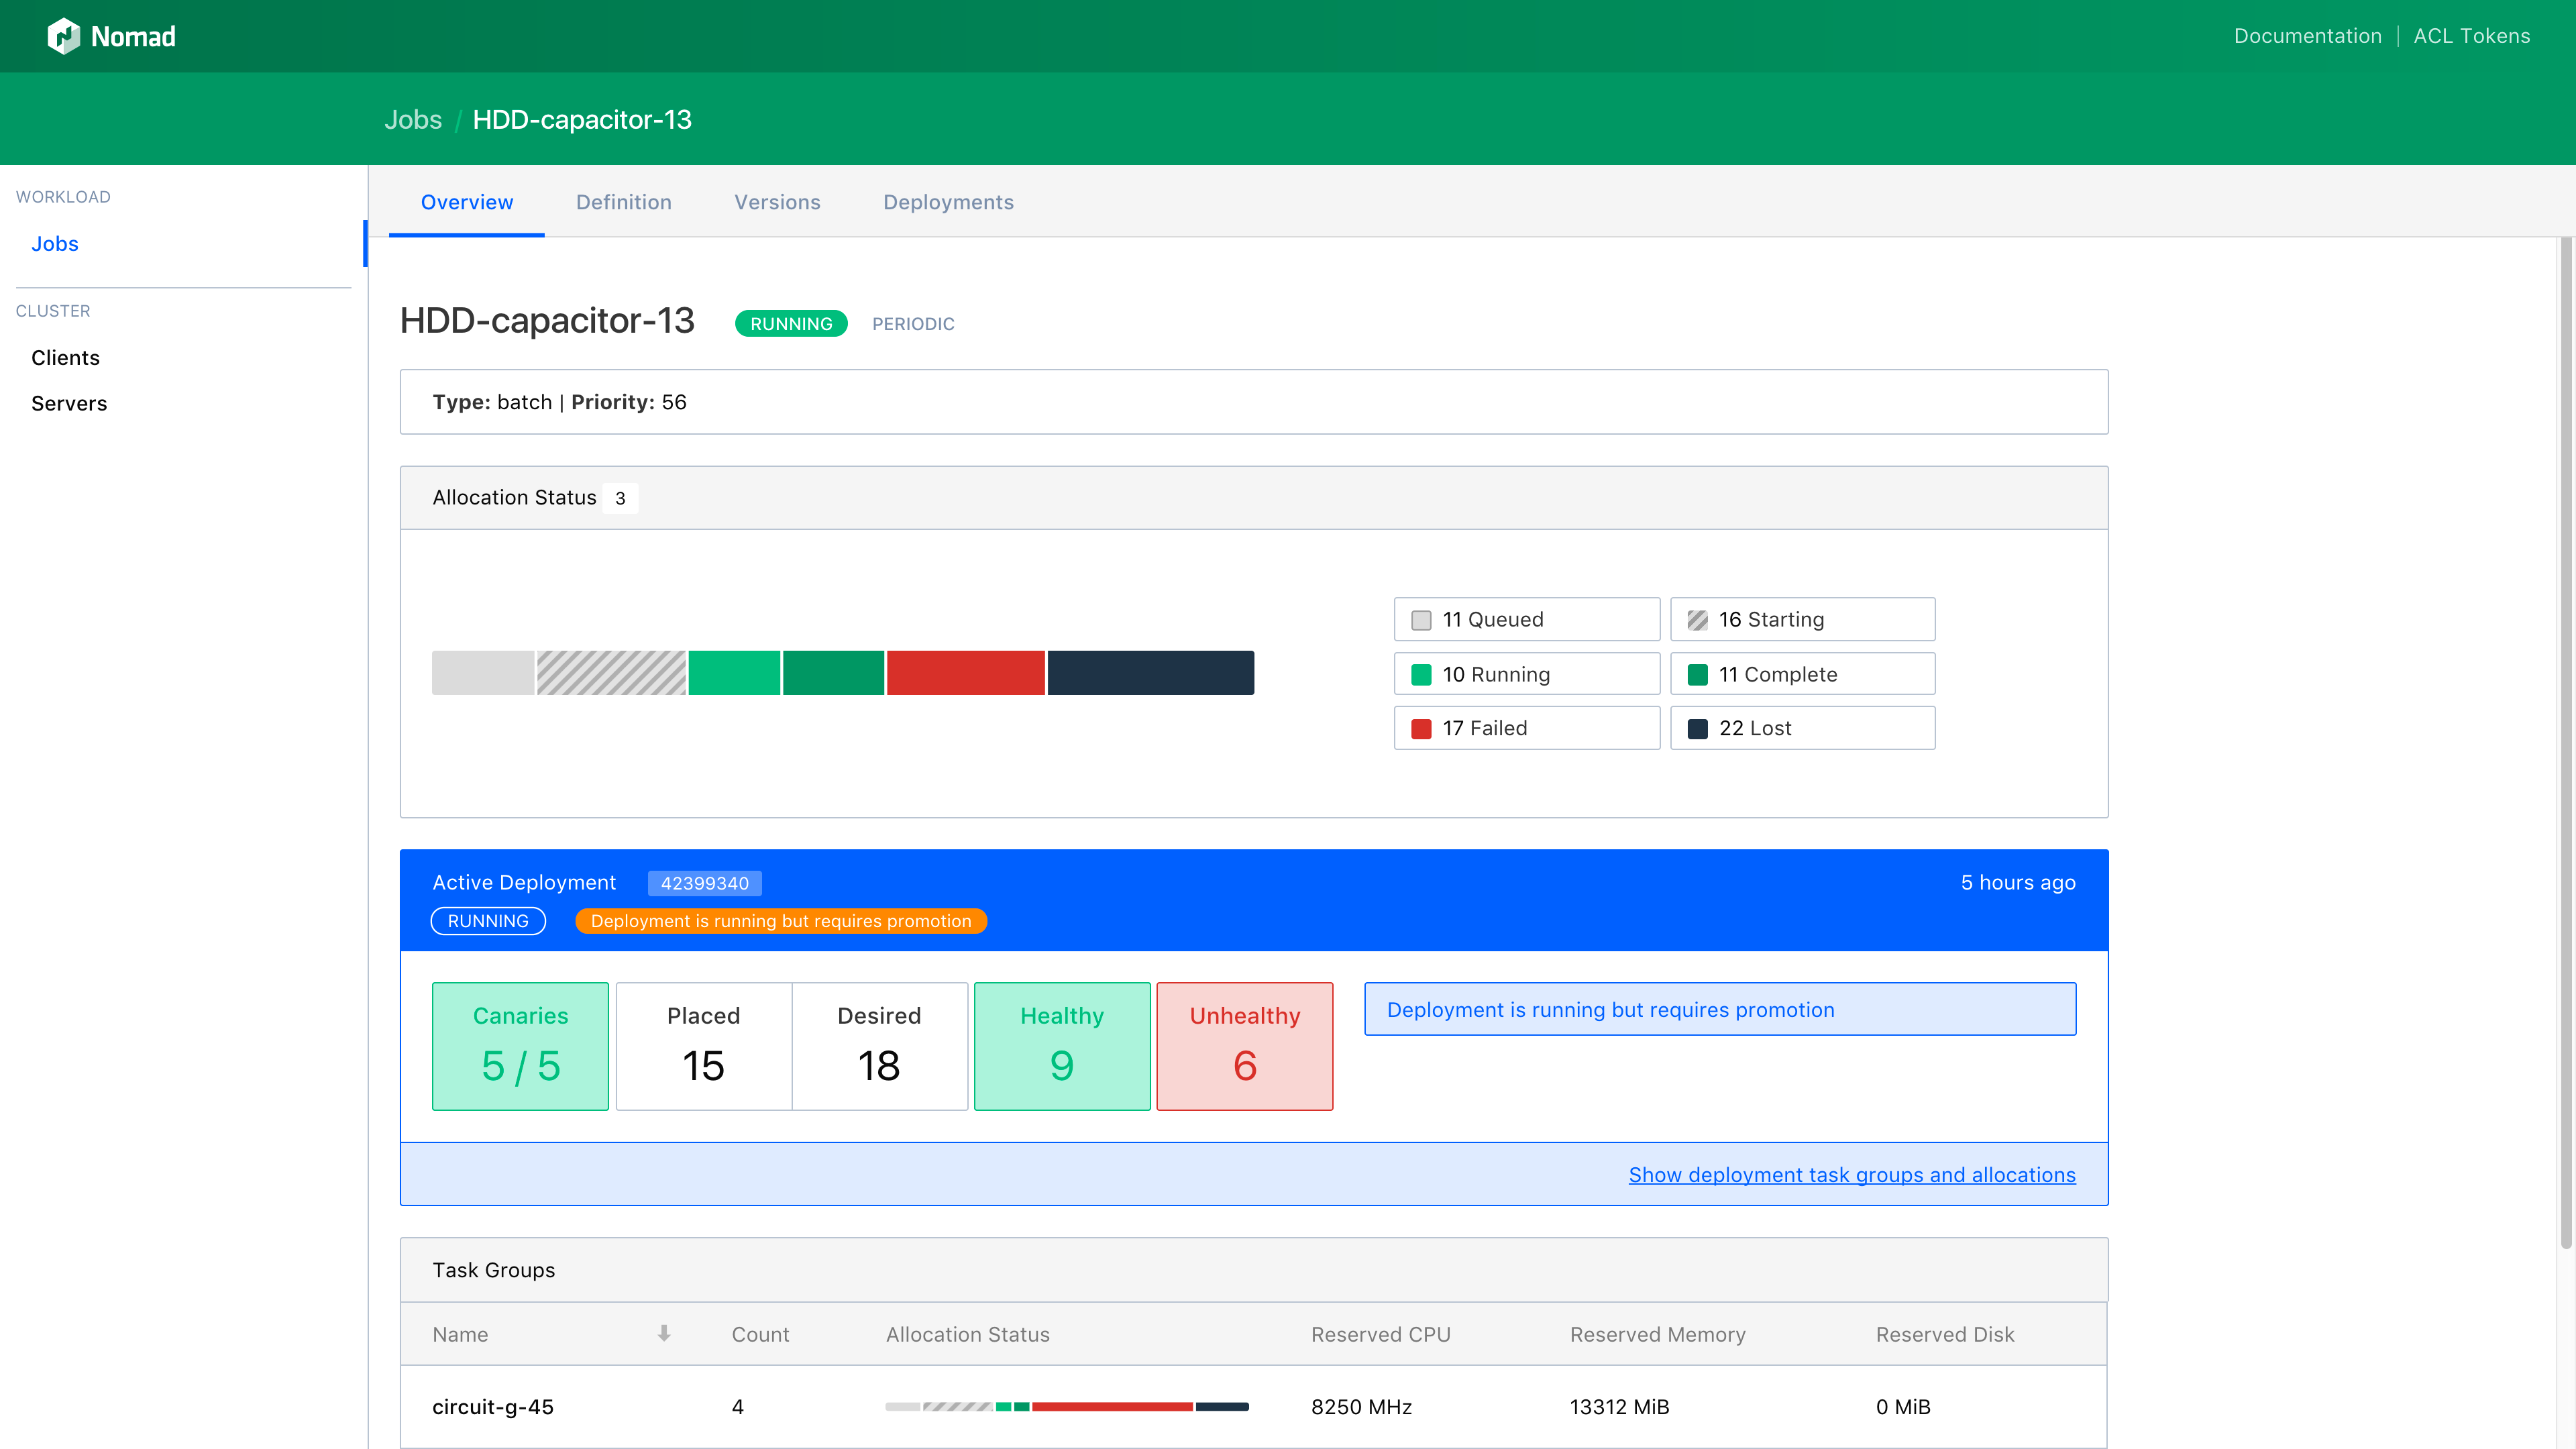
Monitoring a Current Job Deployment
When a deployment is currently running, it is called out on the Job Detail Overview tab.
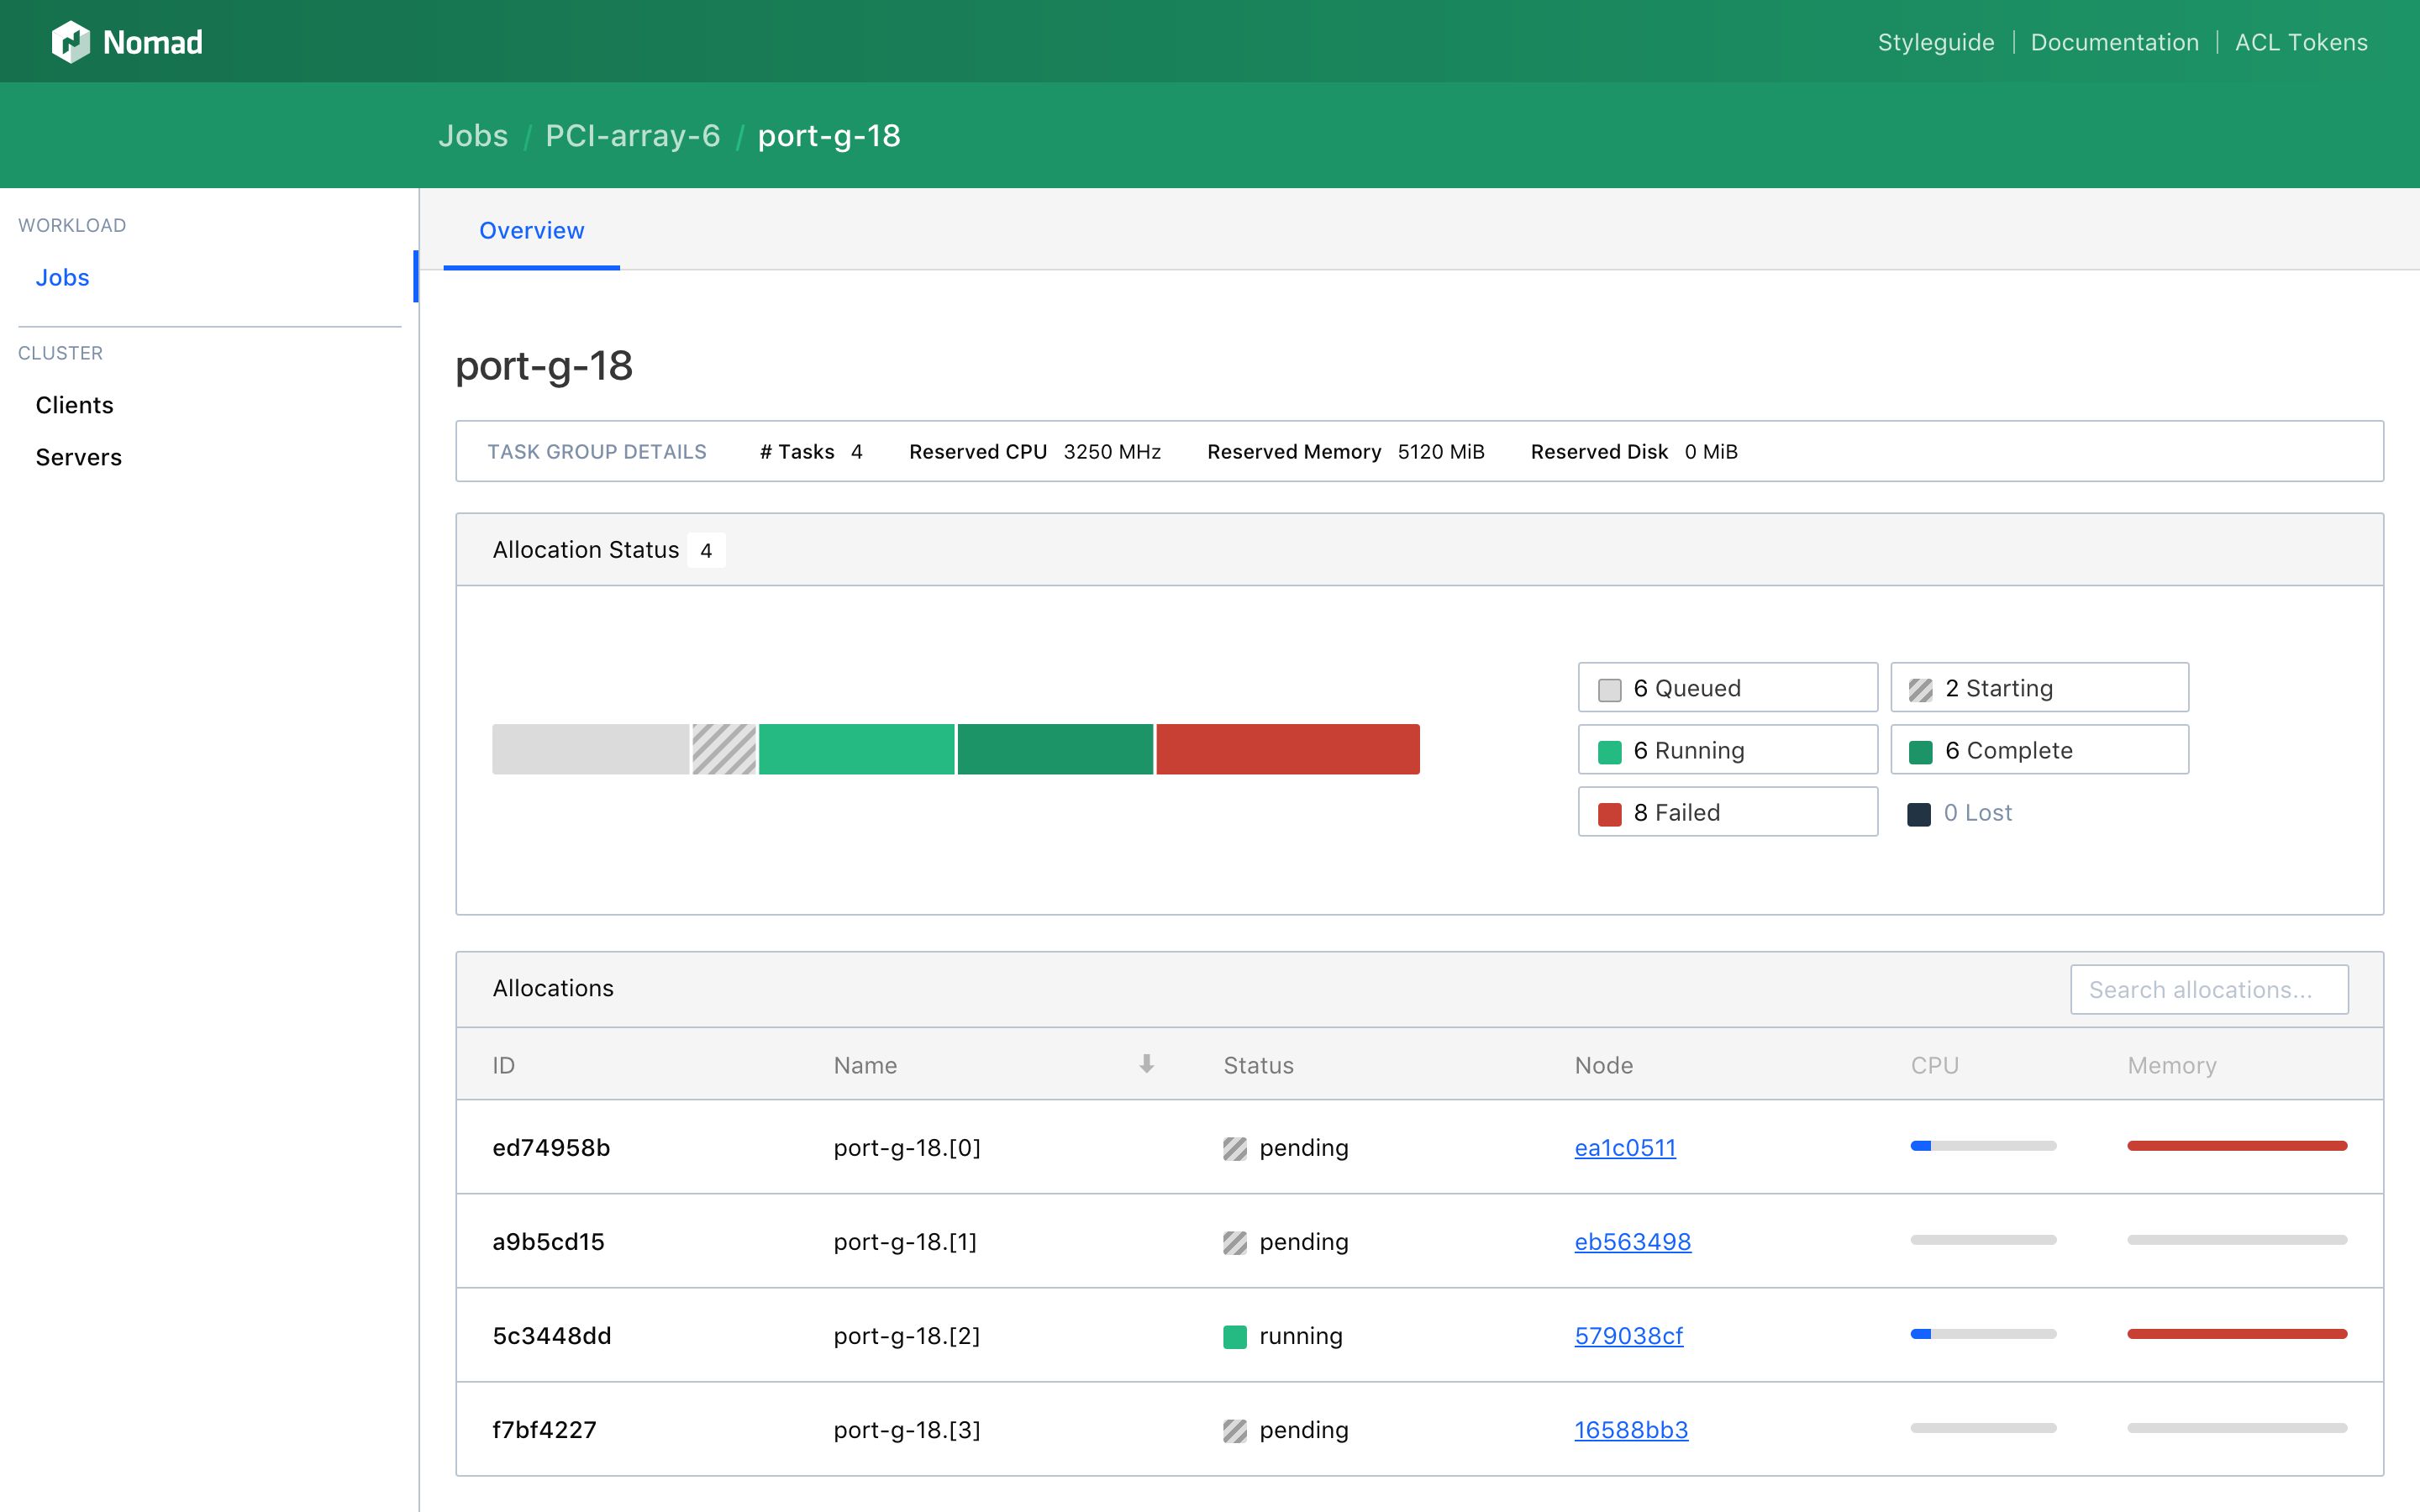
Inspecting a Task Group
Clicking on a task group from the Job Detail page will navigate to the Task Group Detail page. This page shows the aggregated resource metrics for a task group as well as a list of all associated allocations.
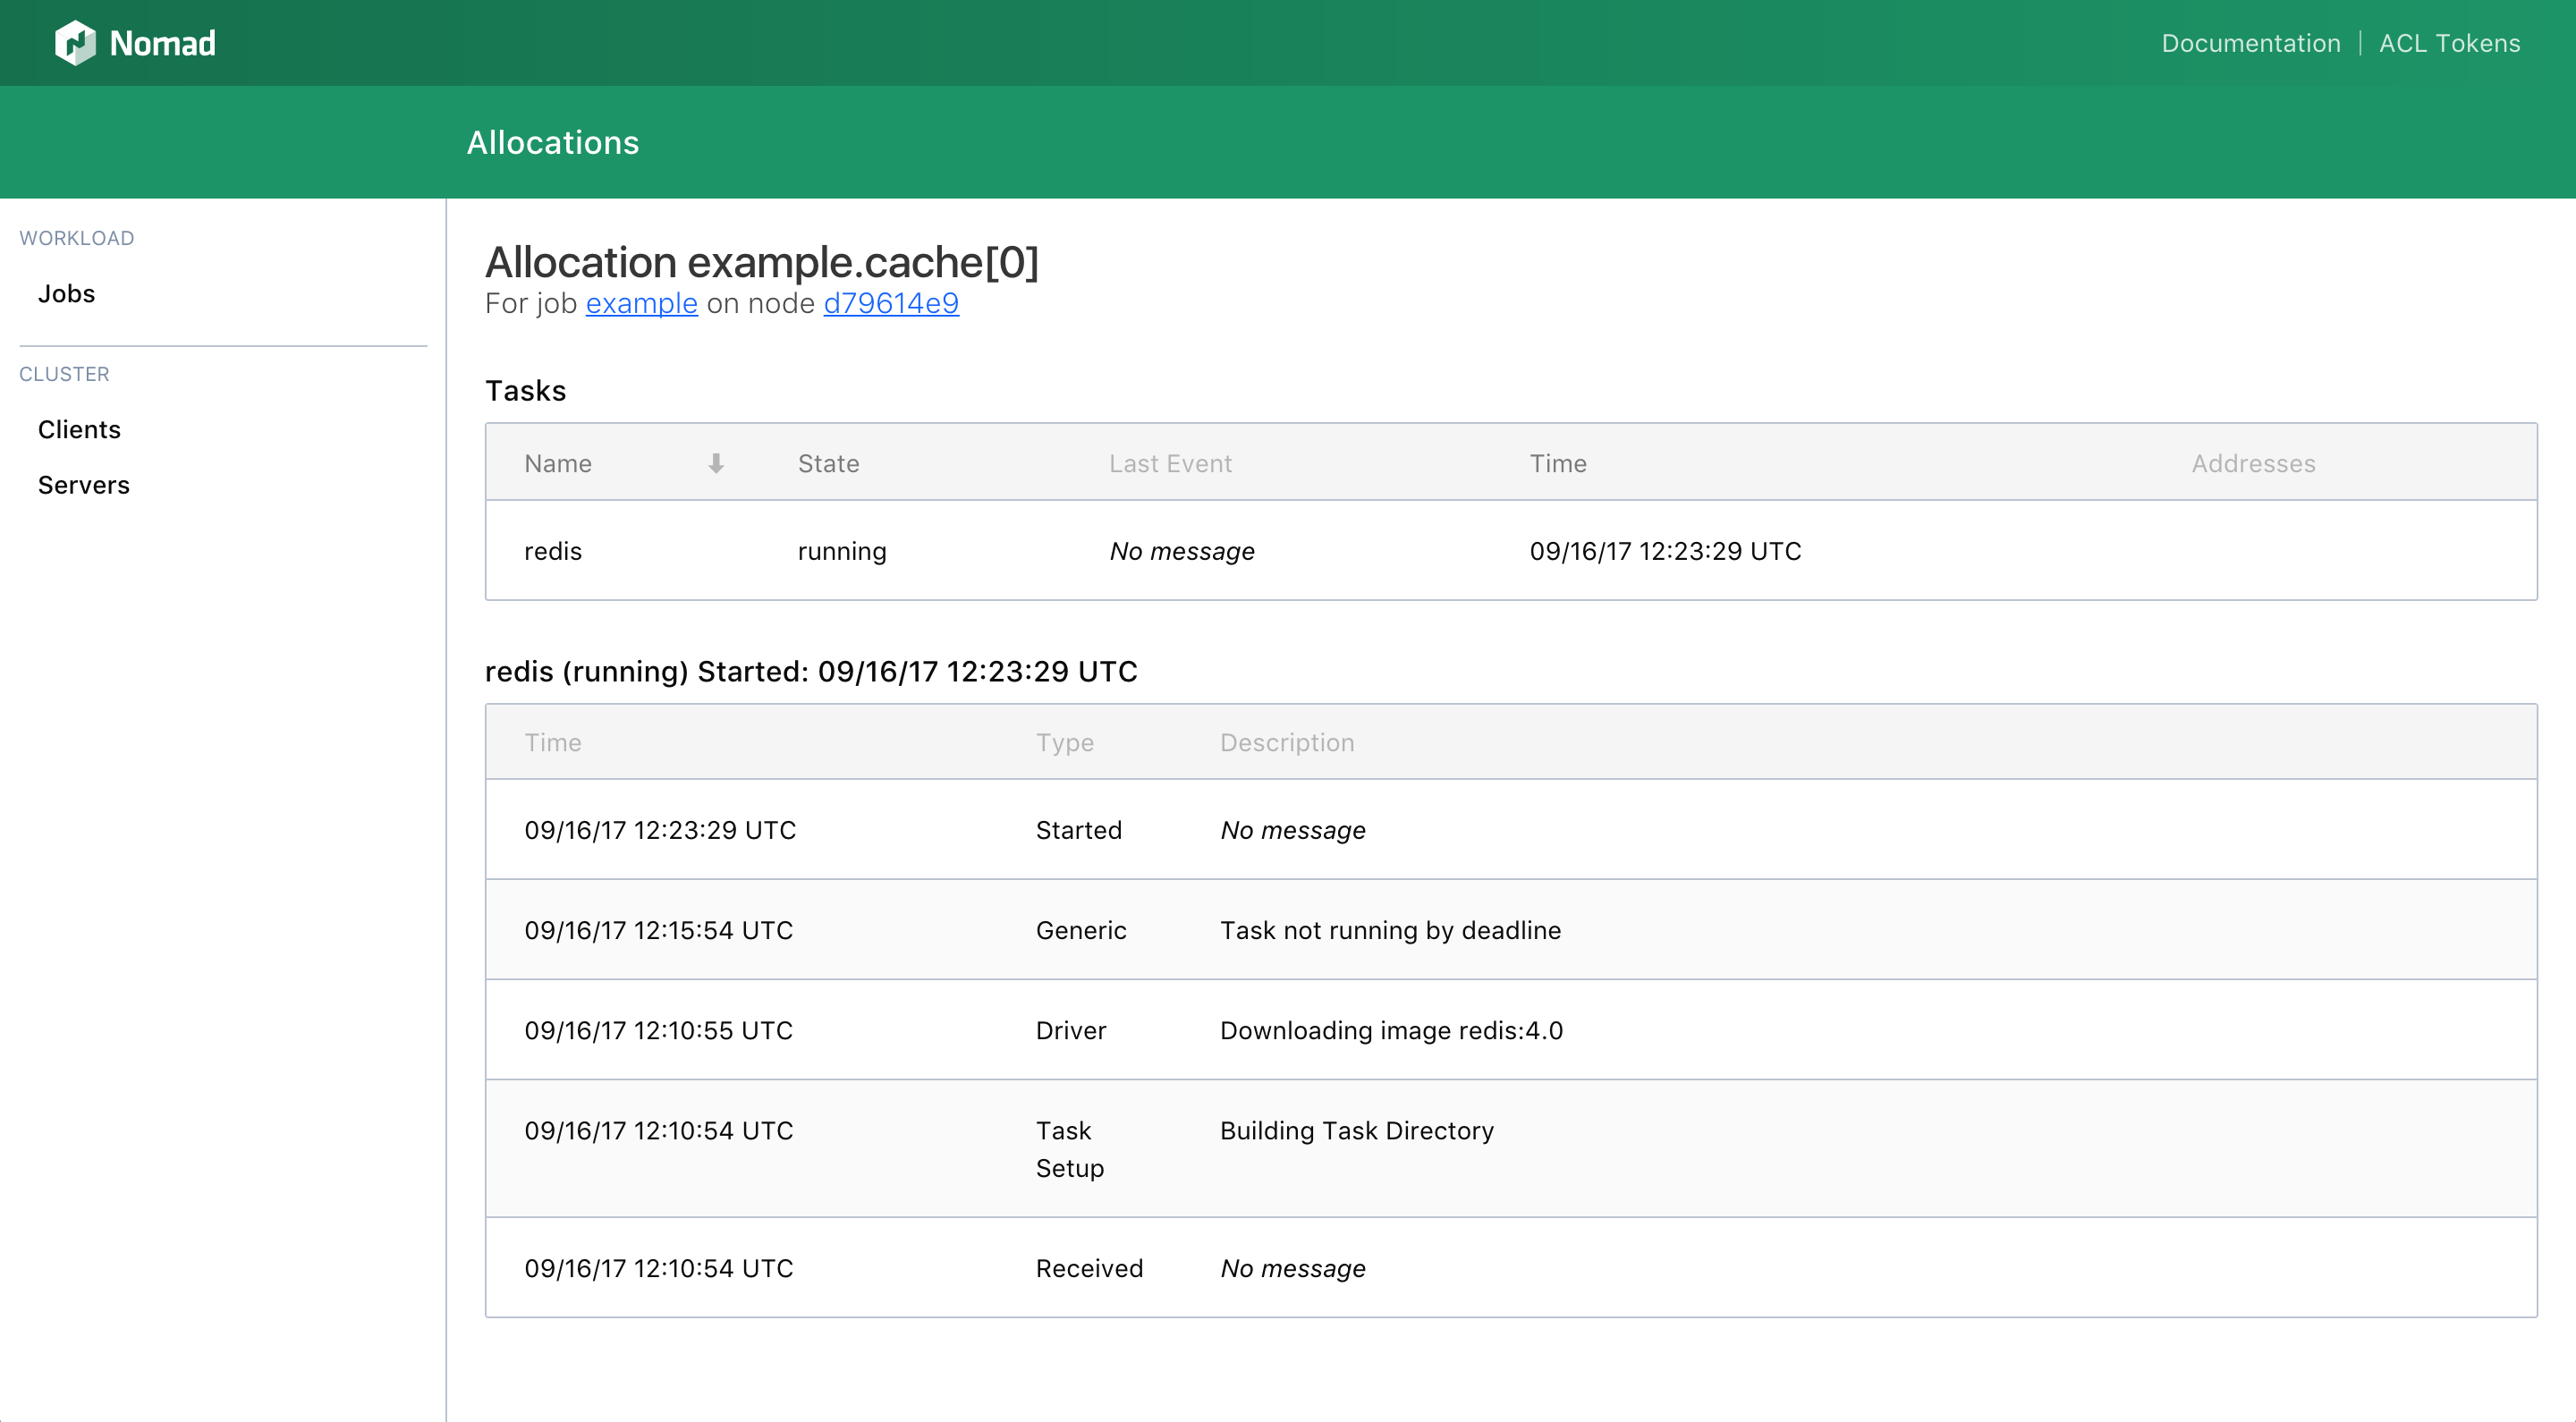
Inspecting an Allocation
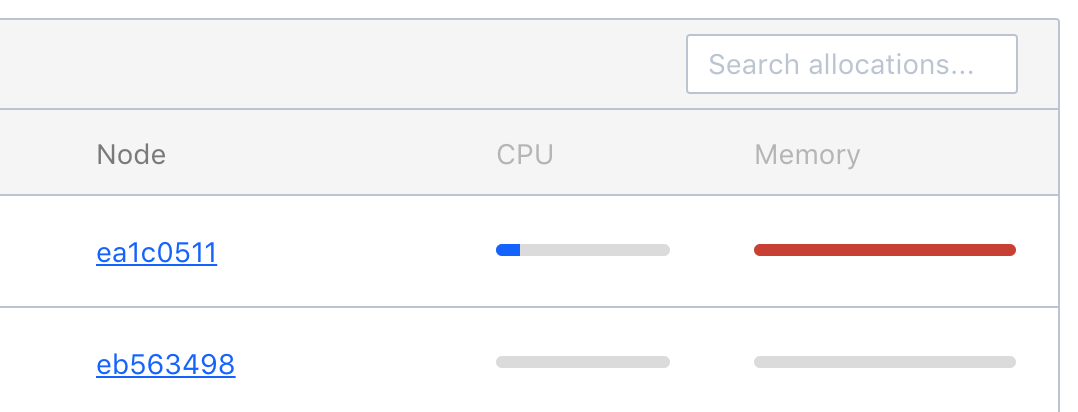
From the Task Group Detail page, each allocation in the allocations table will report basic information about the allocation, including utilized CPU and memory.
~> **Note.** To collect current CPU and memory statistics, the Nomad UI makes requests directly to the client
~> the allocation is running on. These requests will fail unless the browser session is running in the same
~> subnet as the Nomad client.
Clicking an allocation will navigate to the Allocation Detail page. From here, the event history for each task in the allocation can be seen.
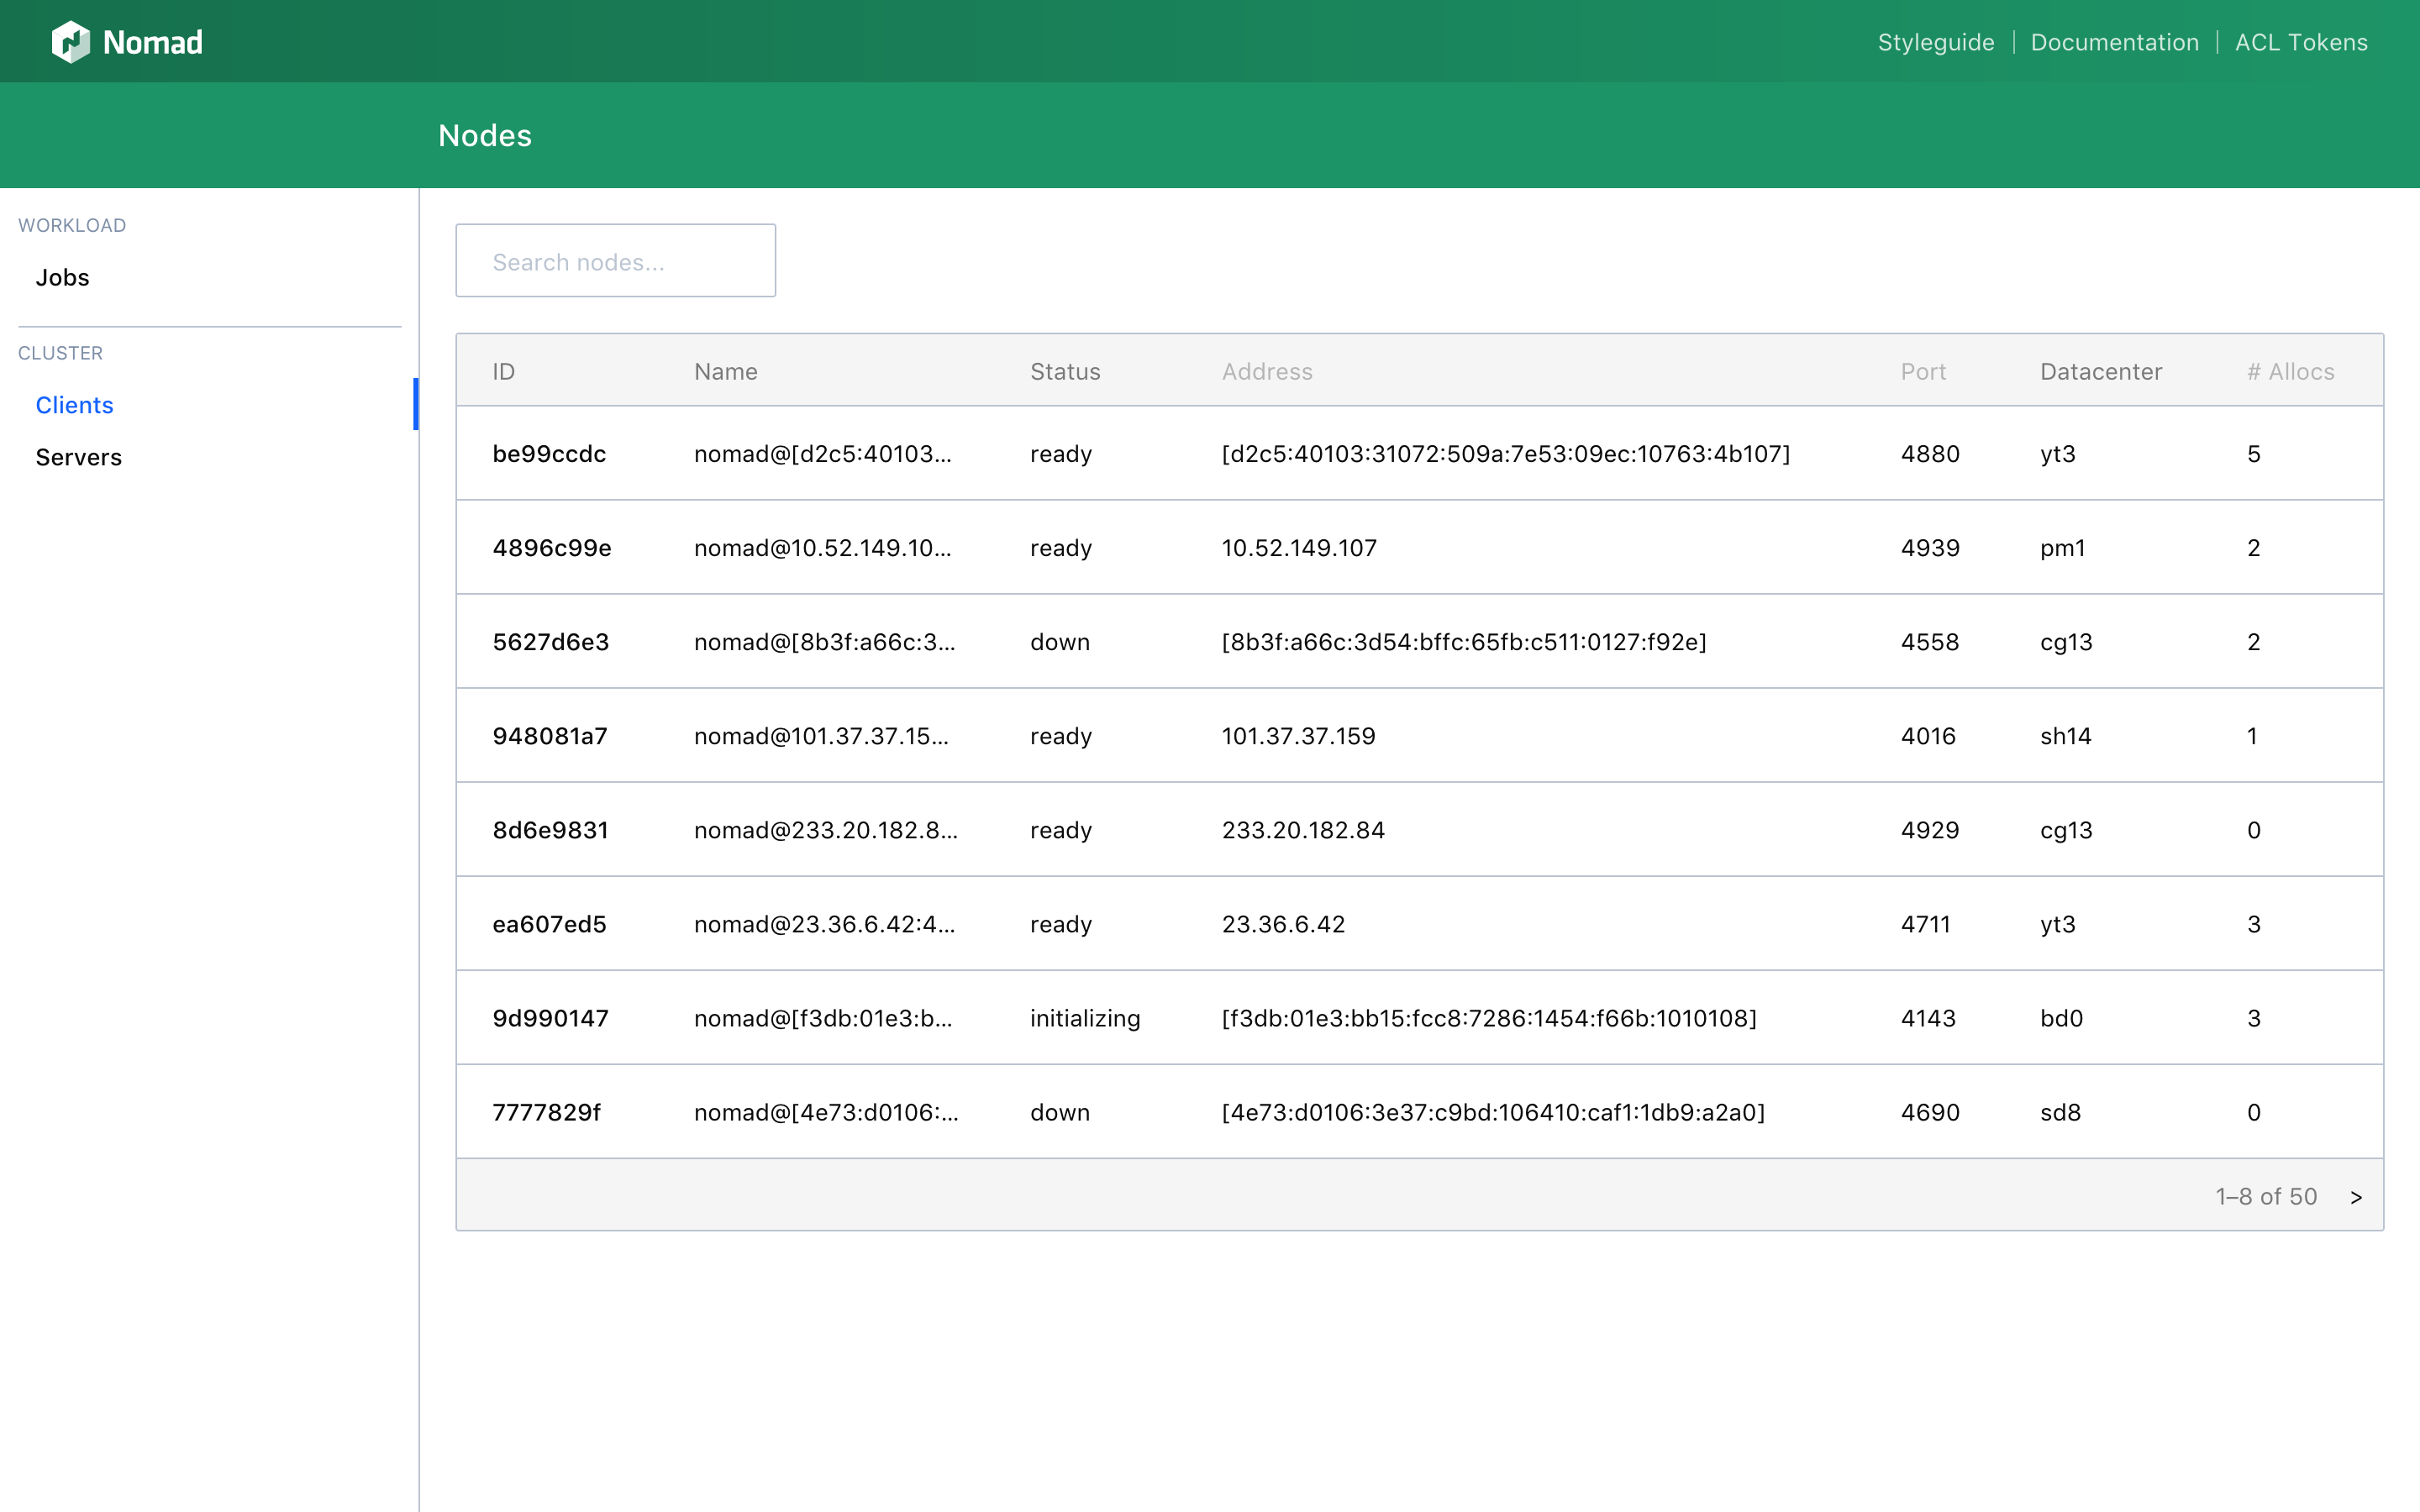
Reviewing Clients
Clicking the Clients link in the left-hand menu of the Nomad UI will navigate to the Clients List page. This page has a searchable, sortable, paginated table of all clients in the cluster.
Sort property, sort direction, search term, and page number are all stored as query params to make sharing links easier.
In addition to name, each client in the table includes details such as current status, address, datacenter, and number of allocations.
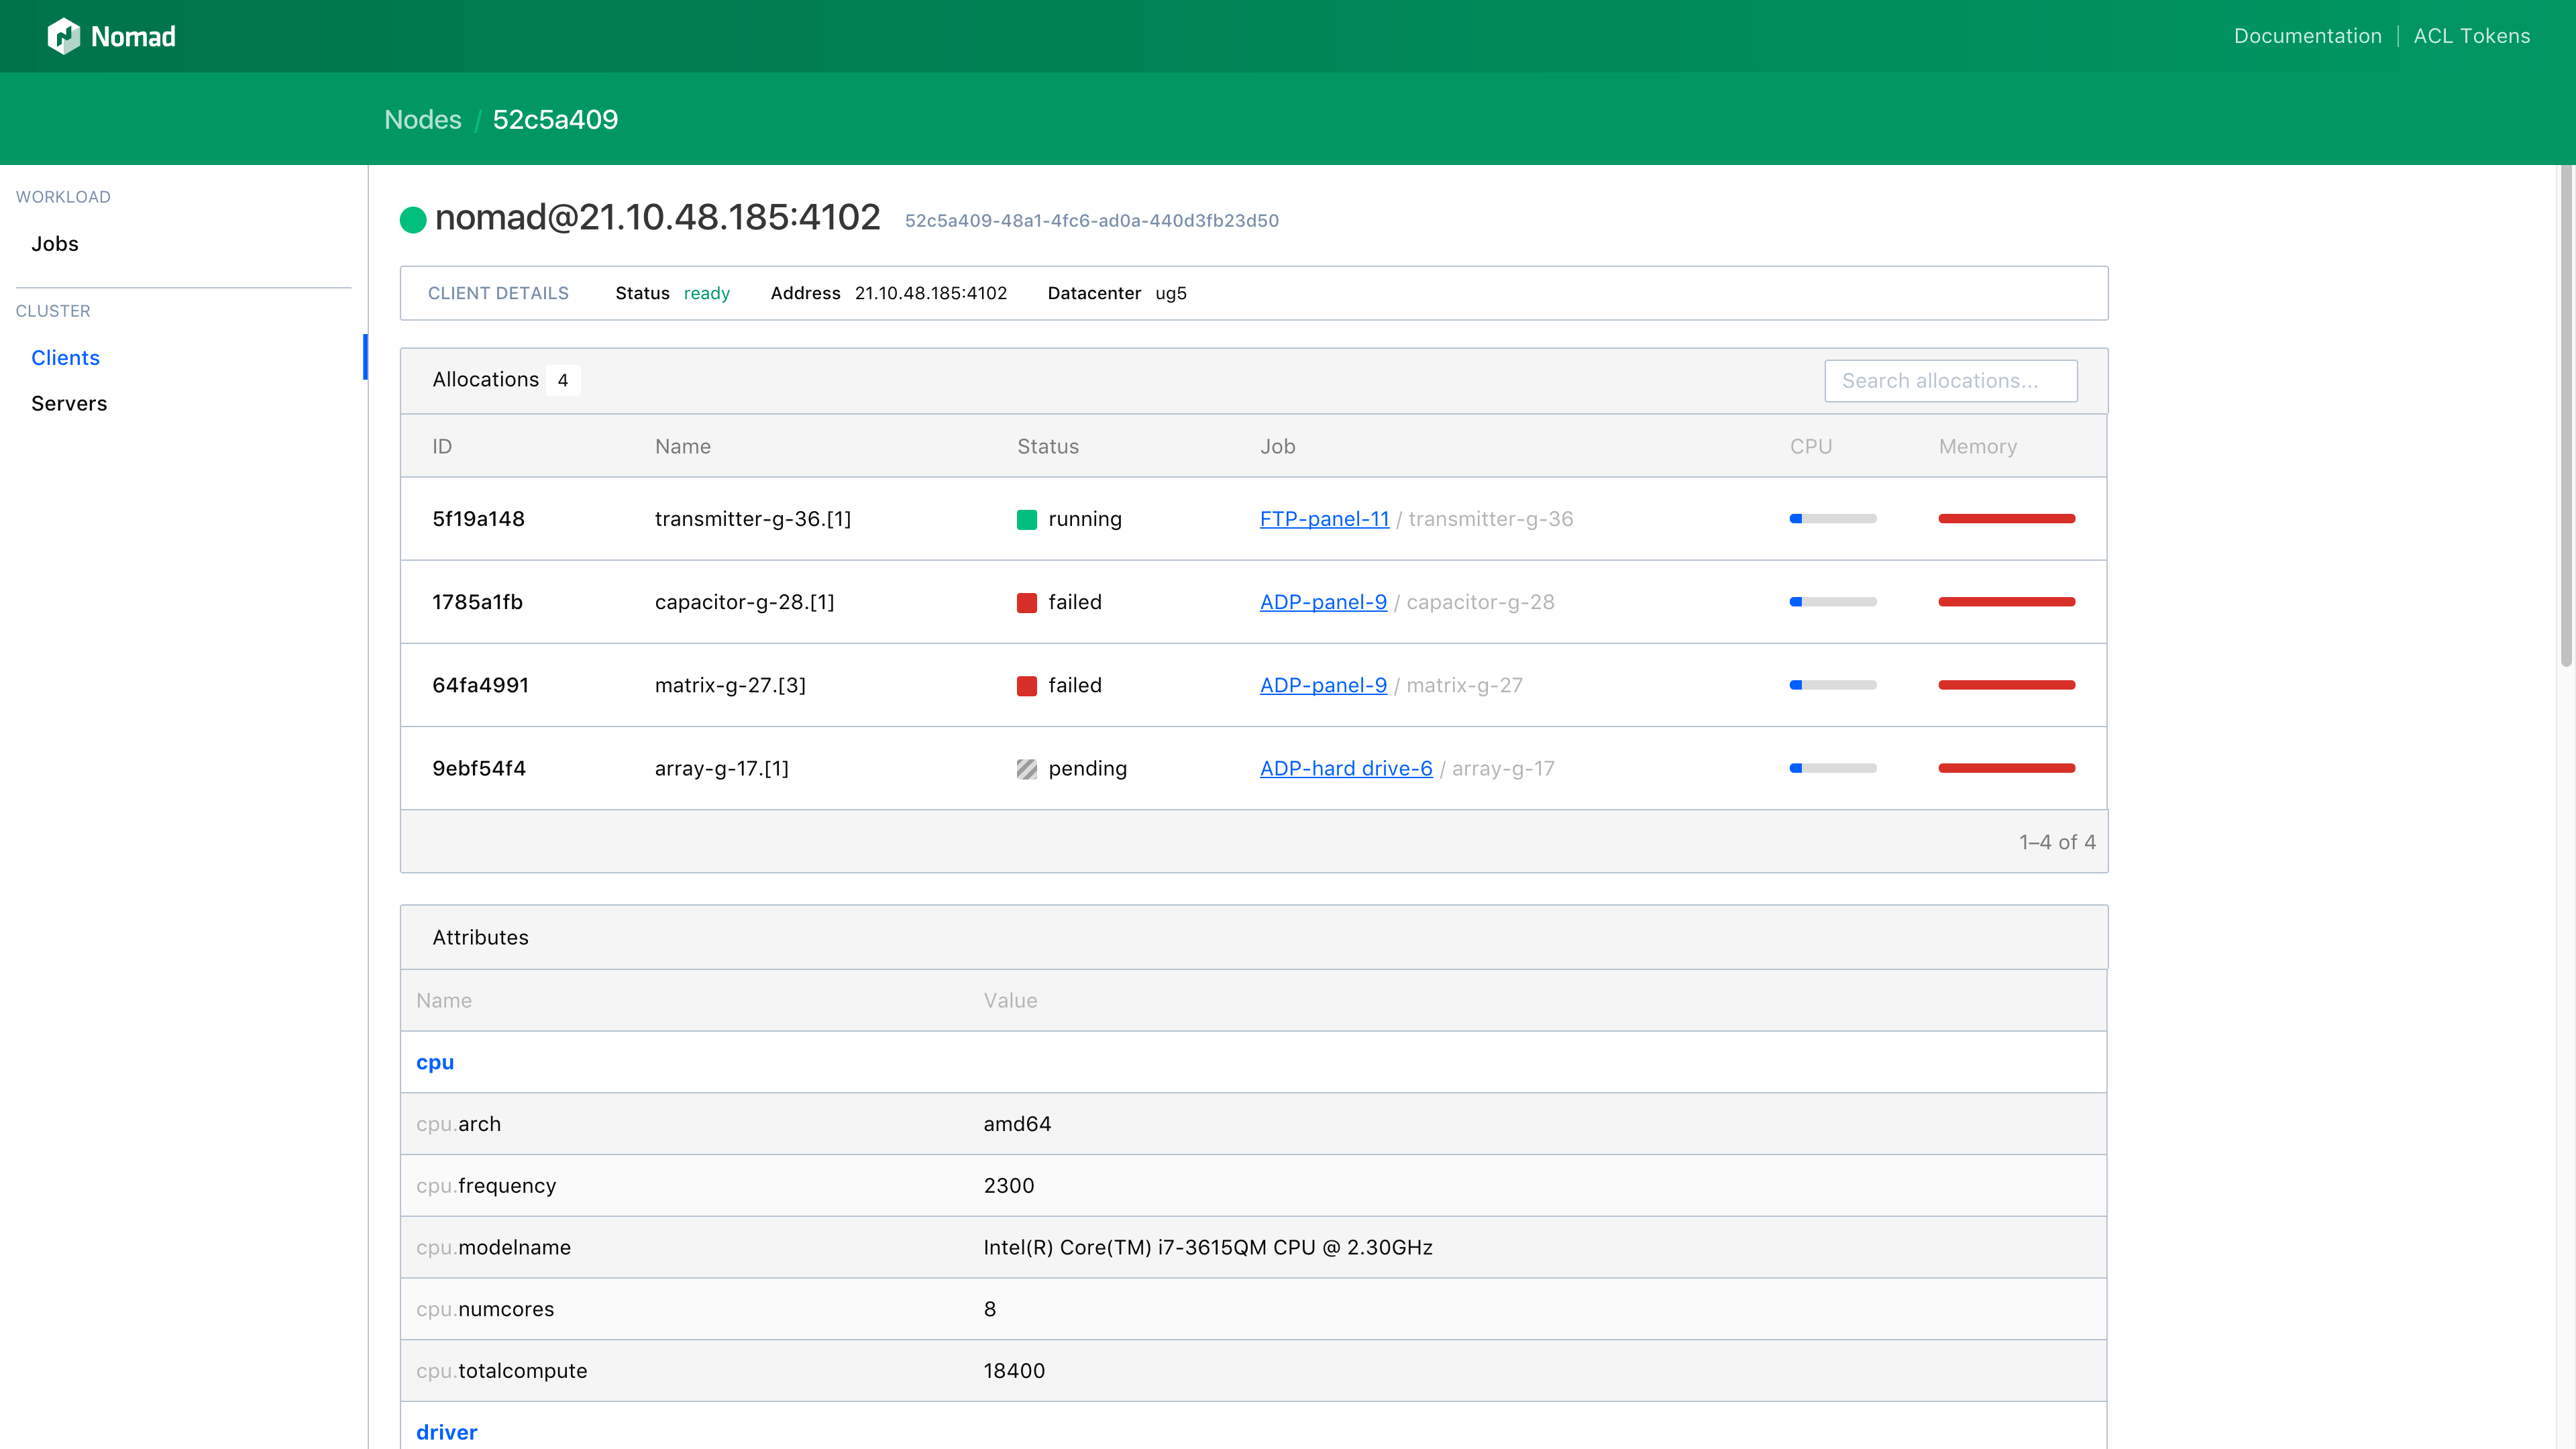
Inspecting a Client
Clicking on a client will navigate to the Client Detail page. This page shows the status of the client as well as the list of all allocations placed on the client. Additionally, all attributes of the machine are itemized.
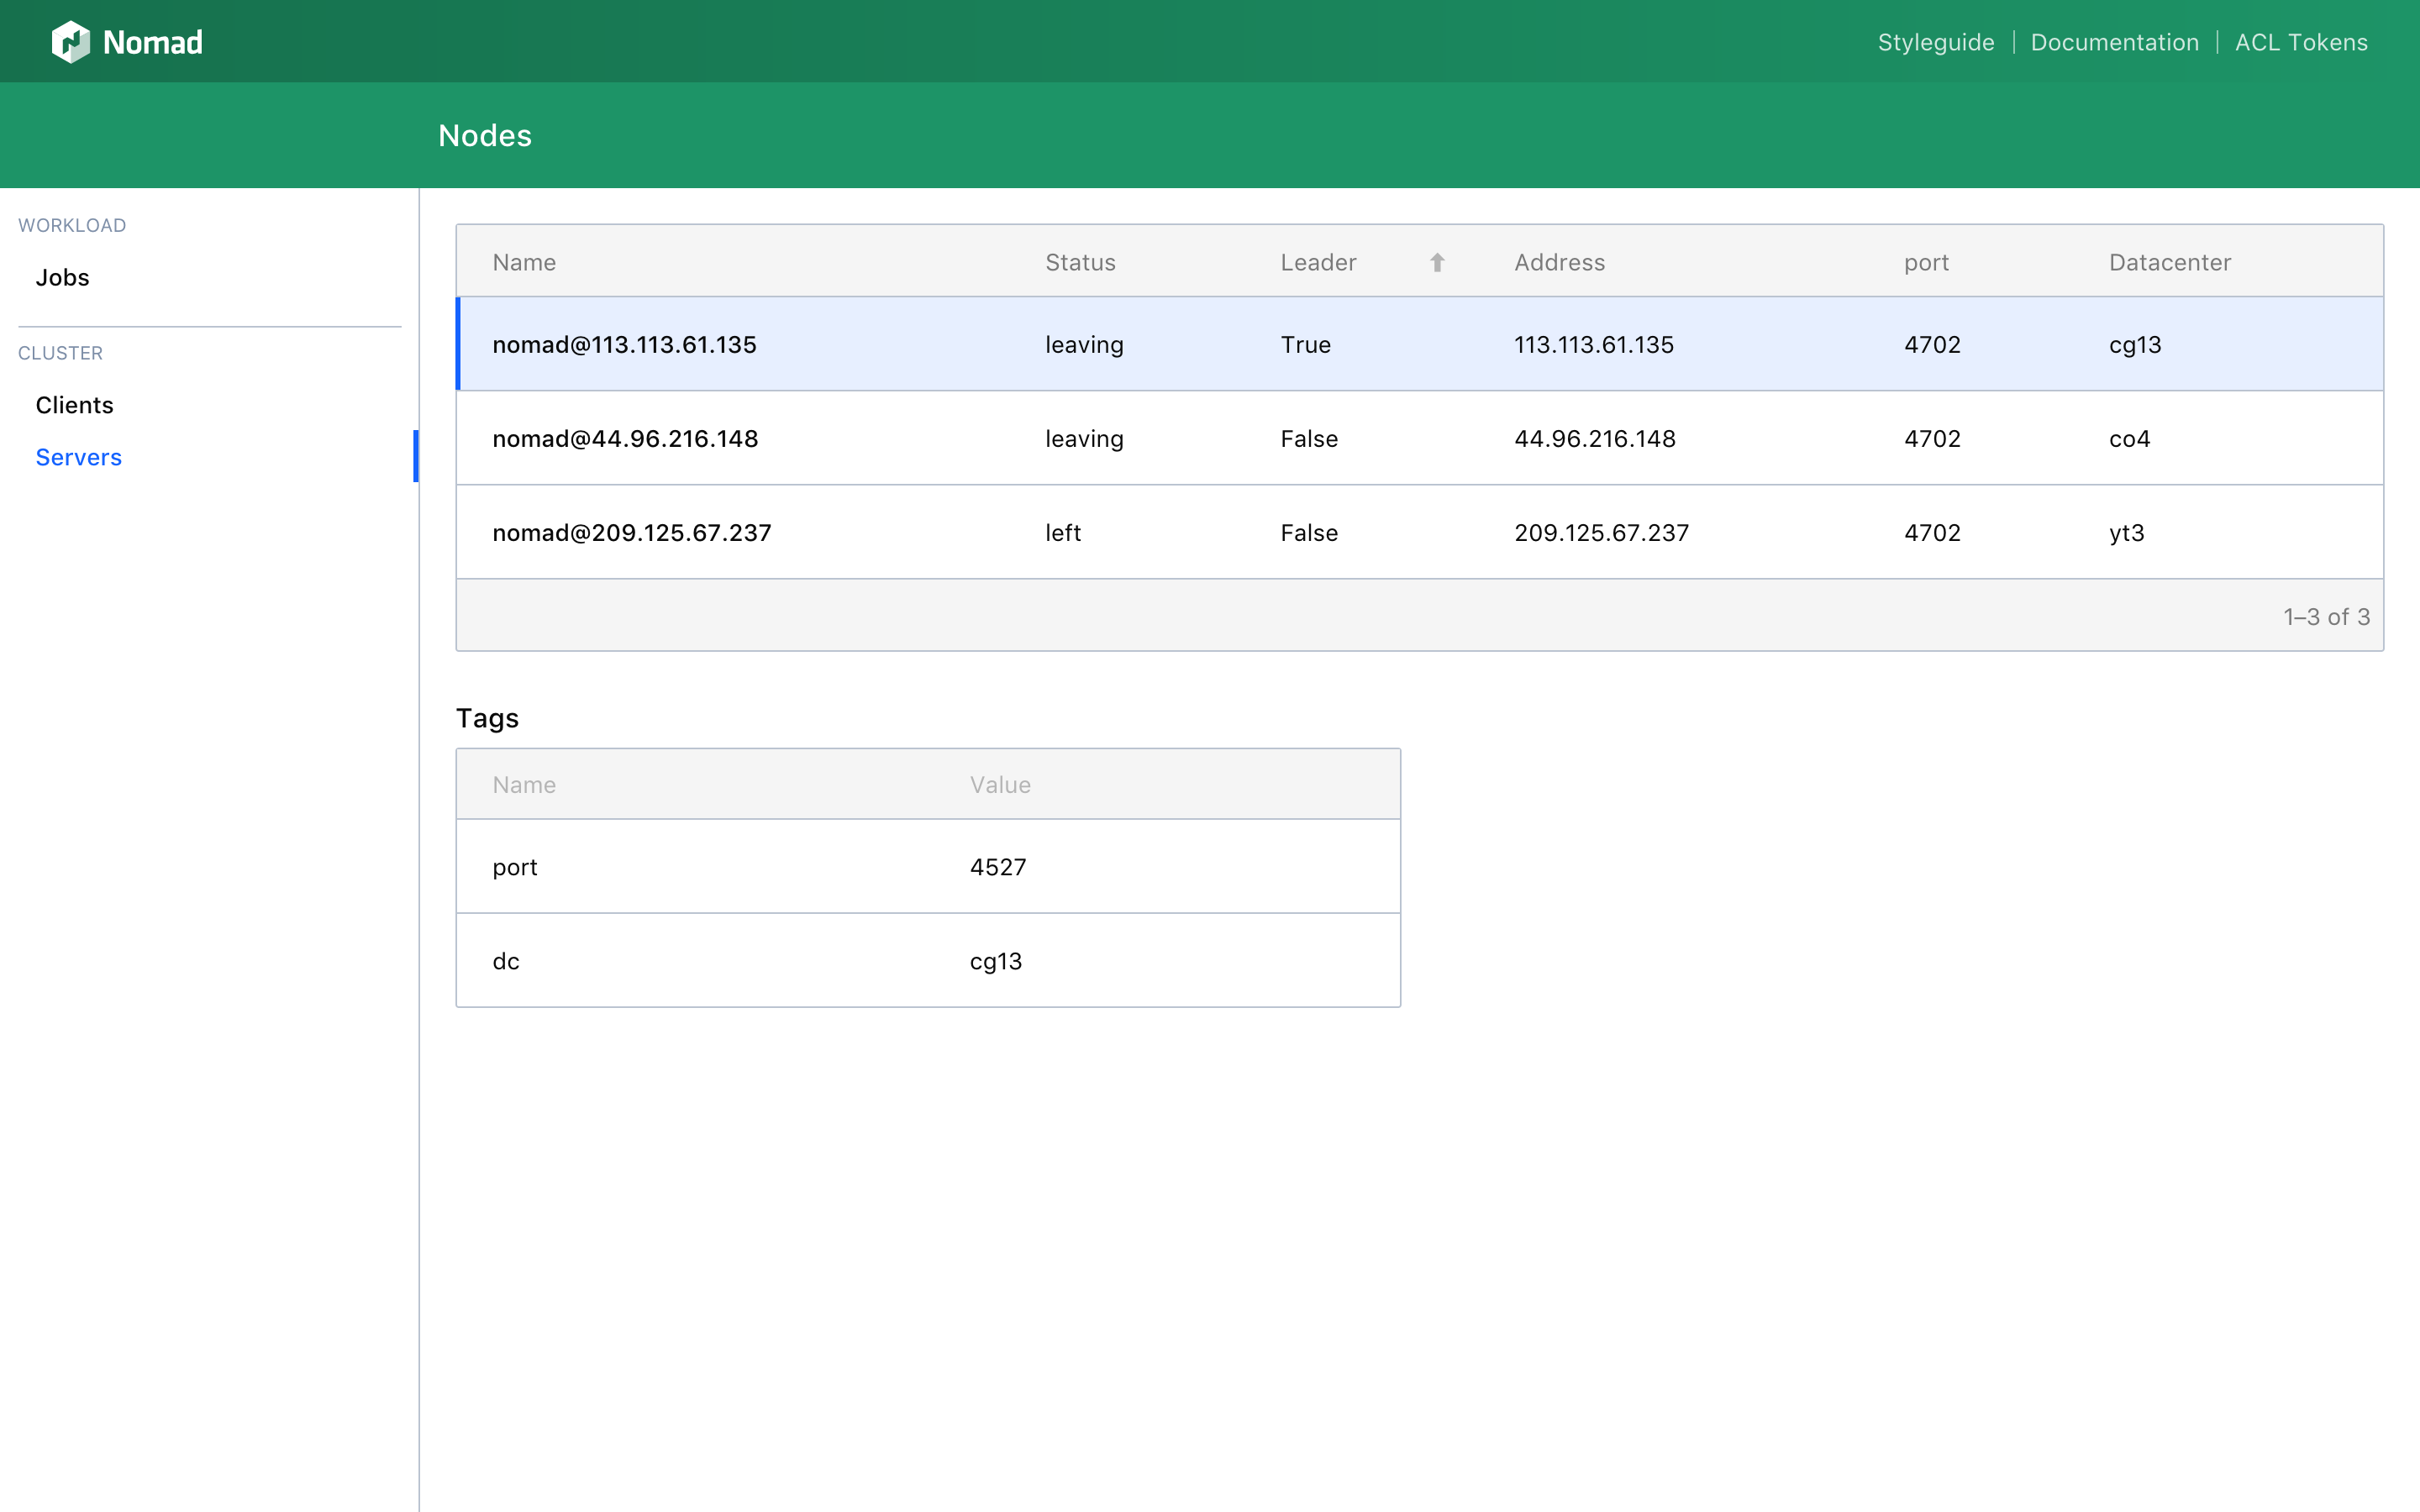
Inspecting Servers
Clicking on the Servers link in the left-hand menu of the Nomad UI will navigate to the Servers List page. This page lists all servers, including which one is the current leader.
Clicking on a server in the list will open up a table that lists the Tags for the server.
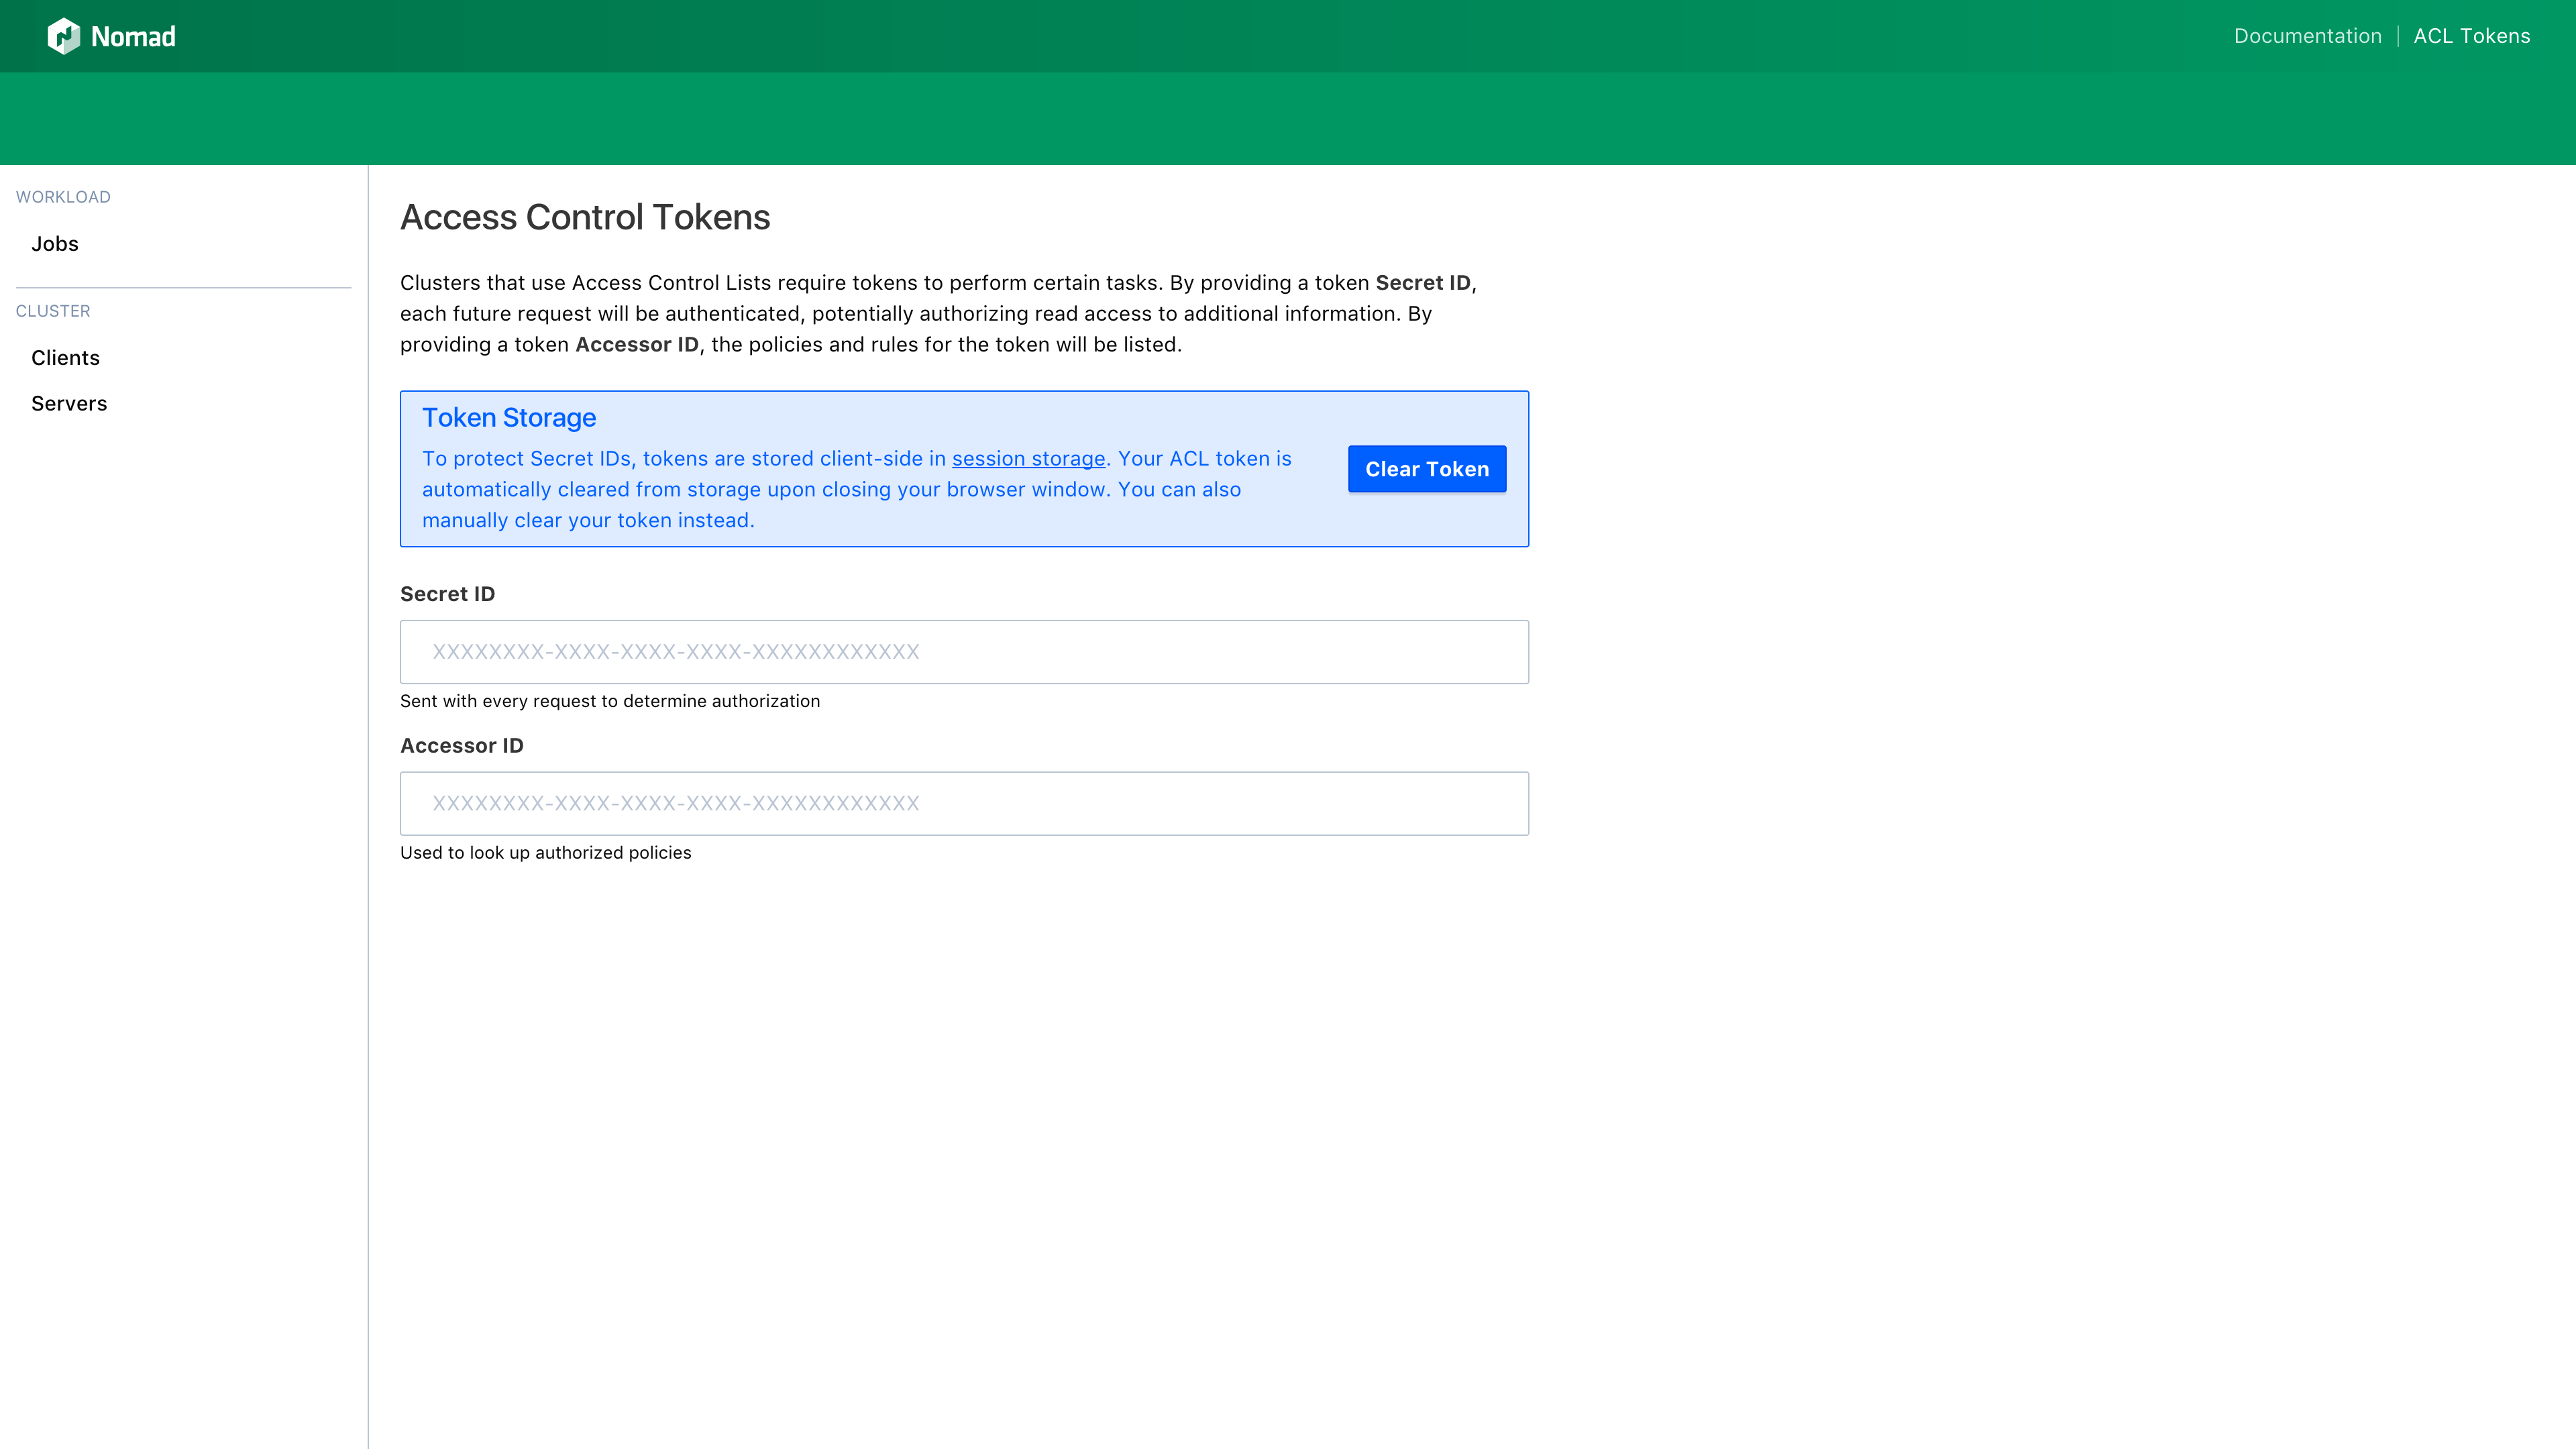
Using an ACL Token
When the Nomad ACL system is enabled for the cluster, tokens can be used to gain elevated permissions to see otherwise private jobs, nodes, and other details. To register a token with the UI, click ACL Tokens on the right-hand side of the top navigation.
The ACL Tokens page has a two field form for providing a token Secret ID and token Accessor ID. The form
automatically updates as the values change, and once a Secret ID is provided, all future HTTP requests the
Nomad UI makes will provide the Secret ID as the ACL Token via the X-Nomad-Token request header.